3. Basic Concepts
Starling might be a compact framework, but it still boasts a significant number of packages and classes. It is built around several basic concepts that are designed to complement and extend each other. Together, they provide you with a set of tools that empower you to create any application you can imagine.
- Display Programming
-
Every object that is rendered on the screen is a display object, organized in the display list.
- Textures & Images
-
To bring pixels, forms and colors to the screen, you will learn to use the Texture and Image classes.
- Dynamic Text
-
Rendering of dynamic text is a basic task in almost every application.
- Event Handling
-
Communication is key! Your display objects need to talk to each other, and they can do that via Starling’s powerful event system.
- Animation
-
Bring some motion into the picture! There are different strategies to animate your display objects.
- Asset Management
-
Learn how to load and organize all kinds of assets, like textures and sounds.
- Special Effects
-
Effects and filters that will make your graphics stand out.
- Utilities
-
A number of helpers to make your life easier.
We’ve got a lot of ground to cover, so, in the words of Super Mario: "Let’s-a go!"
3.1. Configuring Starling
The first step of every Starling-powered application: creating an instance of the Starling class (package starling.core).
Here is the complete declaration of Starling’s constructor:
public function Starling(
    rootClass:Class,
    stage:Stage,
    viewPort:Rectangle = null,
    stage3D:Stage3D = null,
    renderMode:String = auto,
profile:Object = auto);- rootClass
-
The class that is instantiated as soon as Stage3D has finished initializing. Must be a subclass of
starling.display.DisplayObject. - stage
-
The traditional Flash stage that will host Starling’s content. That’s how the Starling and Flash display list are connected to each other.
- viewPort
-
The area within the Flash stage that Starling will render into. Since this is often the full stage size, you can omit this parameter (i.e. pass
null) to use the full area. - stage3D
-
The Stage3D instance used for rendering. Each Flash stage may contain several Stage3D instances and you can pick any one of those. However, the default parameter (
null) will suffice most of the time: this will make Starling use the first available Stage3D object. - renderMode
-
The whole idea behind Stage3D is to provide hardware-accelerated rendering. However, there is also a software fallback mode; it may be forced by passing
Context3DRenderMode.SOFTWARE. The default (auto) is recommended, though — it means that software rendering is used only when there’s no alternative. - profile
-
Stage3D provides a set of capabilities that are grouped into different profiles (defined as constants within
Context3DProfile). The better the hardware the application is running on, the better the available profile. The default (auto) simply picks the best available profile.
Most of these arguments have useful default values, so you will probably not need to specify all of them. The code below shows the most straight-forward way to start Starling. We are looking at the Main class of a Flash Player or AIR project.
package
{
    import flash.display.Sprite;
    import starling.core.Starling;

    [SWF(width="640", height="480",
         backgroundColor="#808080",
         frameRate="60")]
    public class Main extends Sprite
    {
        private var _starling:Starling;

        public function Main()
        {
            _starling = new Starling(Game, stage);
            _starling.start();
        }
    }
}
Note that the class extends flash.display.Sprite, not the Starling variant.
That’s simply a necessity of all Main classes in AS3.
However, as soon as Starling has finished starting up, the logic is moved over to the Game class, which builds our link to the starling.display world.
|
Configuring the Frame Rate
Some settings are configured right in the "SWF" MetaData tag in front of the class.
The frame rate is one of them.
Starling itself does not have an equivalent setting: it always simply uses the frameRate from the native stage.
To change it at runtime, access the |
Starling’s setup process is asynchronous.
That means that you won’t yet be able to access the Game instance at the end of the Main method.
However, you can listen to the ROOT_CREATED event to get notified when the class has been instantiated.
public function Main()
{
    _starling = new Starling(Game, stage);
    _starling.addEventListener(Event.ROOT_CREATED, onRootCreated);
    _starling.start();
}

private function onRootCreated(event:Event, root:Game):void
{
    root.start(); // 'start' needs to be defined in the 'Game' class
}
3.1.1. The ViewPort
Stage3D provides Starling with a rectangular area to draw into. That area can be anywhere within the native stage, which means: anywhere within the area of the Flash Player or the application window (in case of an AIR project).
In Starling, that area is called the viewPort. Most of the time, you will want to use all of the available area, but sometimes it makes sense to limit rendering to a certain region.
Think of a game designed in an aspect ratio of 4:3, running on a 16:9 screen. By centering the 4:3 viewPort on the screen, you will end up with a "letterboxed" game, with black bars at the left and right.
You can’t talk about the viewPort without looking at Starling’s stage, as well. By default, the stage will be exactly the same size as the viewPort. That makes a lot of sense, of course: a device with a display size of 1024 × 768 pixels should have an equally sized stage.
You can customize the stage size, though.
That’s possible via the stage.stageWidth and stage.stageHeight properties:
stage.stageWidth = 1024;
stage.stageHeight = 768;
But wait, what does that even mean? Is the size of the drawing area now defined by the viewPort or the stage size?
Don’t worry, that area is still only set up by the viewPort, as described above.
Modifying the stageWidth and stageHeight doesn’t change the size of the drawing area at all;
the stage is always stretched across the complete viewPort.
What you are changing, though, is the size of the stage’s coordinate system.
That means that with a stage width of 1024, an object with an x-coordinate of 1000 will be close to the right edge of the stage; no matter if the viewPort is 512, 1024, or 2048 pixels wide.
That becomes especially useful when developing for HiDPI screens. For example, Apple’s iPad exists in a normal and a "retina" version, the latter doubling the number of pixel rows and columns (yielding four times as many pixels). On such a screen, the interface elements should not become smaller; instead, they should be rendered more crisply.
By differentiating between the viewPort and the stage size, this is easily reproduced in Starling. On both device types, the stage size will be 1024×768; the viewPort, on the other hand, will reflect the size of the screen in pixels. The advantage: you can use the same coordinates for your display objects, regardless of the device on which the application is running.
|
Points vs. Pixels
If you think this through, you’ll see that on such a retina device, an object with an x-coordinate of |
To find out the actual width (in pixels) of a point, you can simply divide viewPort.width by stage.stageWidth.
Or you use Starling’s contentScaleFactor property, which does just that.
starling.viewPort.width = 2048;
starling.stage.stageWidth = 1024;
trace(starling.contentScaleFactor); // -> 2.0
I will show you how to make full use of this concept in the Mobile Development chapter.
3.1.2. Context3D Profiles
The platforms Starling is running on feature a wide variety of graphics processors. Of course, those GPUs have different capabilities. The question is: how to differentiate between those capabilities at runtime?
That’s what Context3D profiles (also called render profiles) are for.
|
What is a Context3D?
When using Stage3D, you are interacting with a rendering pipeline that features a number of properties and settings. The context is the object that encapsulates that pipeline. Creating a texture, uploading shaders, rendering triangles — that’s all done through the context. |
Actually, Starling makes every effort to hide any profile limitations from you. To ensure the widest possible reach, it was designed to work even with the lowest available profile. At the same time, when running in a higher profile, it will automatically make best use of it.
Nevertheless, it might prove useful to know about their basic features. Here’s an overview of each profile, starting with the lowest.
BASELINE_CONSTRAINED-
If a device supports Stage3D at all, it must support this profile. It comes with several mean limitations, e.g. it only supports textures with side-lengths that are powers of two, and the length of shaders is very limited. That profile is mainly found on old desktop computers.
BASELINE-
The minimum profile to be found on mobile devices. Starling runs well with this profile; the removal of the power-of-two limitation allows for more efficient memory usage, and the length of shader programs is easily sufficient for its needs.
BASELINE_EXTENDED-
Raises the maximum texture size from
2048x2048to4096x4096pixels, which is crucial for high-resolution devices. STANDARD_CONSTRAINED,STANDARD,STANDARD_EXTENDED-
Starling currently doesn’t need any of the features coming with these profiles. They provide additional shader commands and other low-level enhancements.
My recommendation: simply let Starling pick the best available profile (auto) and let it deal with the implications.
|
Maximum Texture Size
There’s only one thing you need to take care of yourself: making sure that your textures are not too big.
The maximum texture size is accessible via the property |
3.1.3. Native Overlay
The main idea behind Starling is to speed up rendering with its Stage3D driven API. However, there’s no denying it: the classic display list has many features that Starling simply can’t offer. Thus, it makes sense to provide an easy way to mix-and-match features of Starling and classic Flash.
The nativeOverlay property is the easiest way to do so.
That’s a conventional flash.display.Sprite that lies directly on top of Starling, taking viewPort and contentScaleFactor into account.
If you need to use conventional Flash objects, add them to this overlay.
Beware, though, that conventional Flash content on top of Stage3D can lead to performance penalties on some (mobile) platforms. For that reason, always remove all objects from the overlay when you don’t need them any longer.
|
Before you ask: no, you can’t add any conventional display objects below Starling display objects. The Stage3D surface is always at the bottom; there’s no way around that. |
3.1.4. Skipping Unchanged Frames
It happens surprisingly often in an application or game that a scene stays completely static for several frames. The application might be presenting a static screen or wait for user input, for example. So why redraw the stage at all in those situations?
That’s exactly the point of the skipUnchangedFrames property.
If enabled, static scenes are recognized as such and the back buffer is simply left as it is.
On a mobile device, the impact of this feature can’t be overestimated.
There’s simply no better way to enhance battery life!
I’m already hearing your objection: if this feature is so useful, why isn’t it activated by default? There must be a catch, right?
Indeed, there is: it doesn’t work well with Render- and VideoTextures.
Changes in those textures simply won’t show up.
It’s easy to work around that, though: either disable skipUnchangedFrames temporarily while using them, or call stage.setRequiresRedraw() whenever their content changes.
Now that you know about this feature, make it a habit to always activate it! In the meantime, I hope that I can solve the mentioned problems in a future Starling version.
On mobile platforms, there’s another limitation you should be aware of: as soon as there’s any content on the native (Flash) stage (e.g. via Starling’s nativeOverlay), Starling can’t skip any frames.
That’s the consequence of a Stage3D limitation.
|
3.1.5. The Statistics Display
When developing an application, you want as much information as possible about what’s going on. That way, you will be able to spot problems early and maybe avoid running into a dead end later. The statistics display helps with that.
_starling.showStats = true;
What’s the meaning of those values?
-
The framerate should be rather self-explanatory: the number of frames Starling managed to render during the previous second.
-
Standard memory is, in a nutshell, what your AS3 objects fill up. Whether it’s a String, a Sprite, a Bitmap, or a Function: all objects require some memory. The value is given in megabytes.
-
GPU memory is separate from that. Textures are stored in graphics memory, as are vertex buffers and shader programs. Most of the time, textures will overshadow everything else.
-
The number of draw calls indicates how many individual "draw"-commands are sent to the GPU in each frame. Typically, a scene renders faster when there are fewer draw calls. We will look in detail at this value when we talk about Performance Optimization.
You might notice that the background color of the statistics display alternates between black and dark green.
That’s a subtle clue that’s referring to the skipUnchangedFrames property:
whenever the majority of the last couple of frames could be skipped, the box turns green.
Make sure that it stays green whenever the stage is static; if it doesn’t, some logic is preventing frame skipping to kick in.
You can customize the location of the statistics display on the screen via the method showStatsAt.
|
3.2. Display Programming
With all the setup procedures out of the way, we can start to actually put some content onto the screen!
In every application you create, one of your main tasks will be to split it up into a number of logical units. More often than not, those units will have a visual representation. In other words: each unit will be a display object.
3.2.1. Display Objects
All elements that appear on screen are types of display objects.
The starling.display package includes the abstract DisplayObject class; it provides the basis for a number of different types of display objects, such as images, movie clips, and text fields, to name just a few.
The DisplayObject class provides the methods and properties that all display objects share. For example, the following properties are used to configure an object’s location on the screen:
-
x,y: the position in the current coordinate system. -
width,height: the size of the object (in points). -
scaleX,scaleY: another way to look at the object size;1.0means unscaled,2.0doubles the size, etc. -
rotation: the object’s rotation around its origin (in radians). -
skewX,skewY: horizontal and vertical skew (in radians).
Other properties modify the way the pixels appear on the screen:
-
blendMode: determines how the object’s pixels are blended with those underneath. -
filter: special GPU programs (shaders) that modify the look of the object. Filters can e.g. blur the object or add a drop shadow. -
mask: masks cut away all parts that are outside a certain area. -
alpha: the opacity of the object, from0(invisible) to1(fully opaque). -
visible: if false, the object is hidden completely.
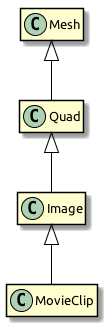
Those are the basics that every display object must support. Let’s look at the class hierarchy around this area of Starling’s API:
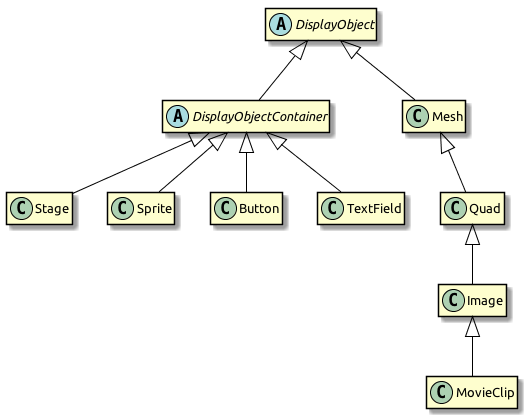
You’ll notice that the diagram is split up in two main sub-branches.
On the one side, there are a couple of classes that extend Mesh: Quad, Image, and MovieClip.
Meshes are a fundamental part of Starling’s rendering architecture. Everything that is drawn to the screen is a mesh, actually! Stage3D cannot draw anything but triangles, and a mesh is nothing else than a list of points that spawn up triangles.
On the other side, you’ll find a couple of classes that extend DisplayObjectContainer. As its name suggests, this class acts as a container for other display objects. It makes it possible to organize display objects into a logical system — the display list.
3.2.2. The Display List
The hierarchy of all display objects that will be rendered is called the display list. The Stage makes up the root of the display list. Think of it as the literal "stage": your users (the audience) will only see objects (actors) that have entered the stage. When you start Starling, the stage will be created automatically for you. Everything that’s connected to the stage (directly or indirectly) will be rendered.
When I say "connected to", I mean that there needs to be a parent-child relationship. To make an object appear on the screen, you make it the child of the stage, or any other DisplayObjectContainer that’s connected to the stage.
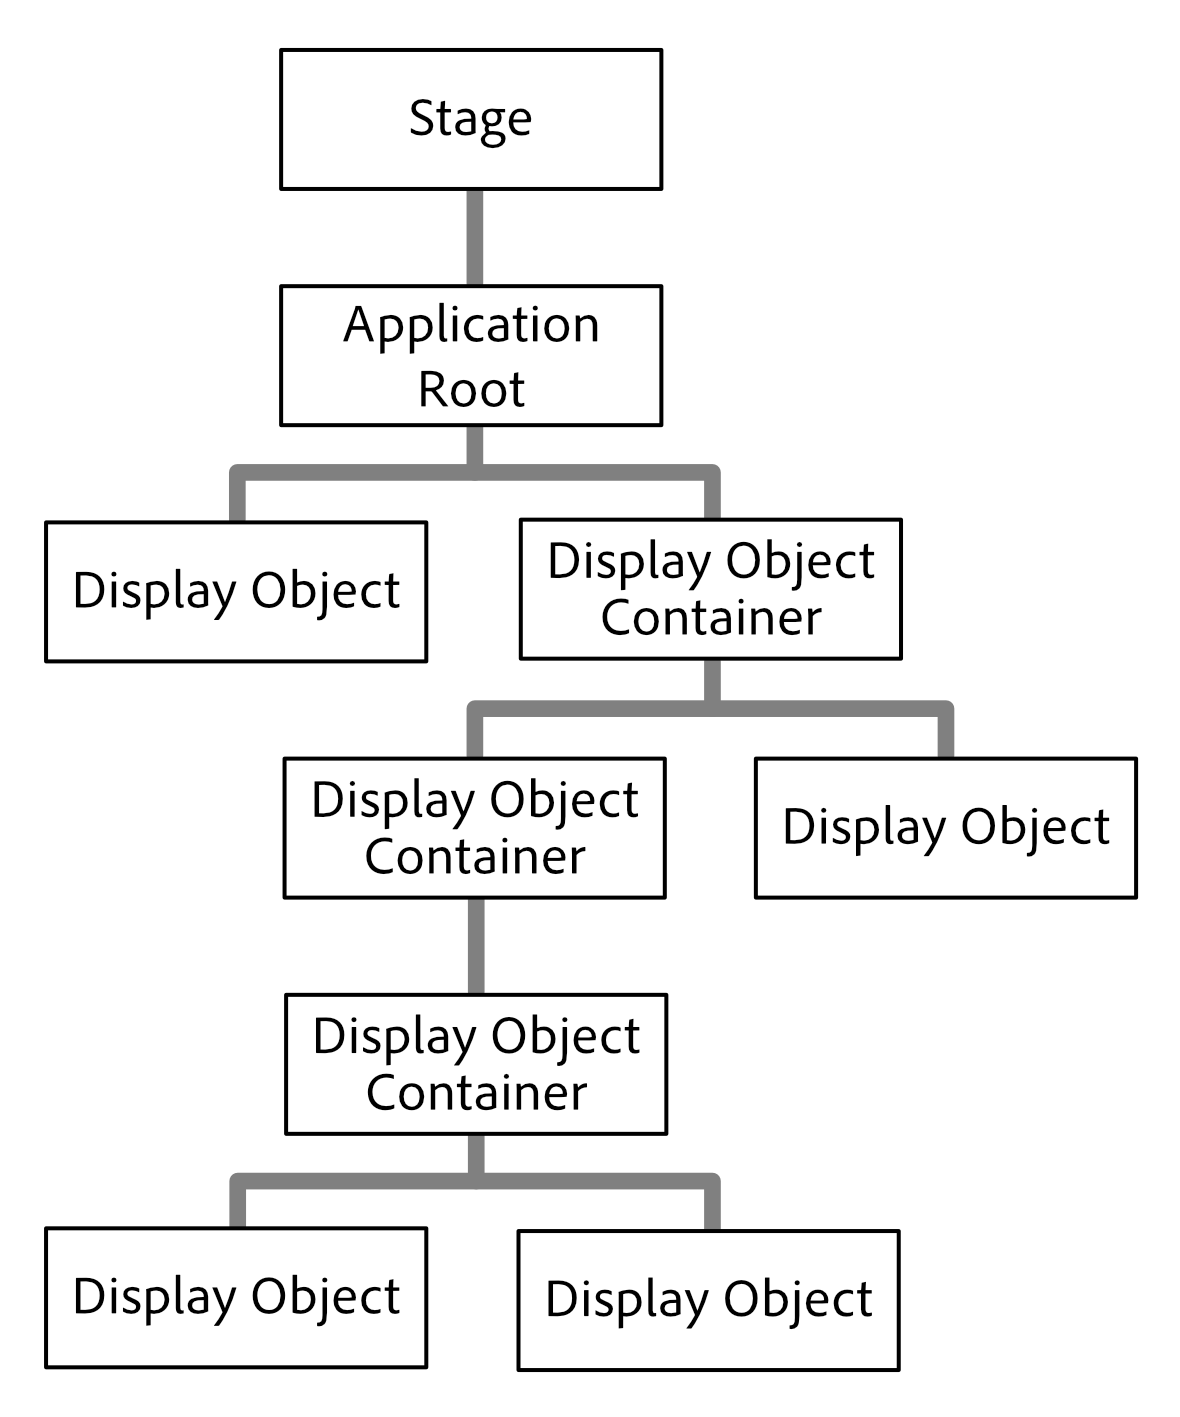
The first (and, typically: only) child of the stage is the application root: that’s the class you pass to the Starling constructor. Just like the stage, it’s probably going to be a DisplayObjectContainer. That’s where you take over!
You will create containers, which in turn will contain other containers, and meshes (e.g. images). In the display list, those meshes make up the leaves: they cannot have any child objects.
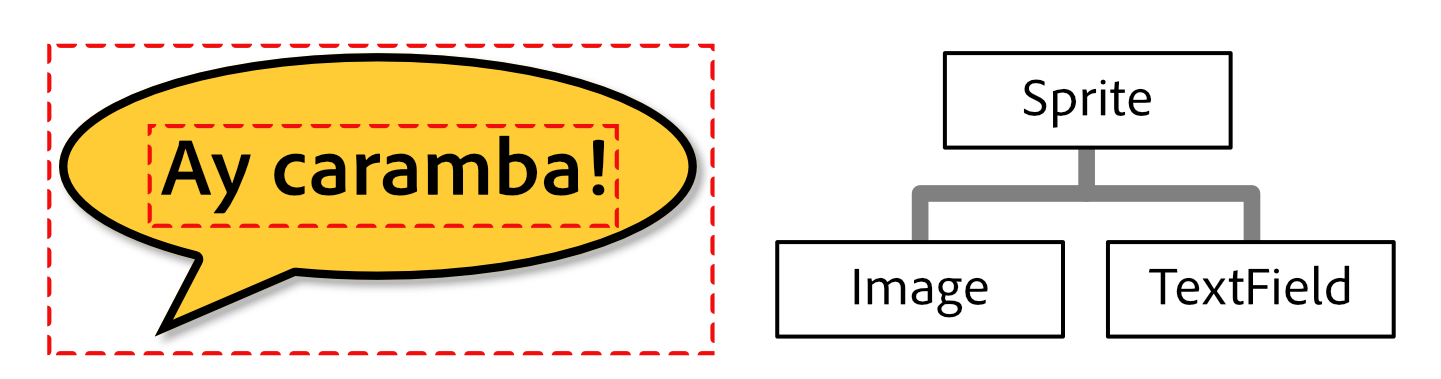
Since all of this sounds very abstract, let’s look at a concrete example: a speech bubble. To create a speech bubble, you will need an image (for the bubble), and some text (for its contents).
Those two objects should act as one: when moved, both image and text should follow along. The same applies for changes in size, scaling, rotation, etc. That can be achieved by grouping those objects inside a very lightweight DisplayObjectContainer: the Sprite.
|
DisplayObjectContainer vs. Sprite
DisplayObjectContainer and Sprite can be used almost synonymously. The only difference between those two classes is that one (DisplayObjectContainer) is abstract, while the other (Sprite) is not. Thus, you can use a Sprite to group objects together without the need of a subclass. The other advantage of Sprite: it’s just much faster to type. Typically, that’s the main reason why I’m preferring it. Like most programmers, I’m a lazy person! |
So, to group text and image together, you create a sprite and add text and image as children:
var sprite:Sprite = new Sprite(); (1)
var image:Image = new Image(texture);
var textField:TextField = new TextField(200, 50, "¡Ay, caramba!");
sprite.addChild(image); (2)
sprite.addChild(textField); (3)| 1 | Create a sprite. |
| 2 | Add an Image to the sprite. |
| 3 | Add a TextField to the sprite. |
The order in which you add the children is important — they are placed like layers on top of each other.
Here, textField will appear in front of image.
Now that those objects are grouped together, you can work with the sprite just as if it was just one object.
var numChildren:int = sprite.numChildren; (1)
var totalWidth:Number = sprite.width; (2)
sprite.x += 50; (3)
sprite.rotation = deg2rad(90); (4)| 1 | Query the number of children. Here, the result will be 2. |
| 2 | width and height take into account the sizes and positions of the children. |
| 3 | Move everything 50 points to the right. |
| 4 | Rotate the group by 90 degrees (Starling always uses radians). |
In fact, DisplayObjectContainer defines many methods that help you manipulate its children:
function addChild(child:DisplayObject):void;
function addChildAt(child:DisplayObject, index:int):void;
function contains(child:DisplayObject):Boolean;
function getChildAt(index:int):DisplayObject;
function getChildIndex(child:DisplayObject):int;
function removeChild(child:DisplayObject, dispose:Boolean=false):void;
function removeChildAt(index:int, dispose:Boolean=false):void;
function swapChildren(child1:DisplayObject, child2:DisplayObject):void;
function swapChildrenAt(index1:int, index2:int):void;
3.2.3. Coordinate Systems
Every display object has its own coordinate system.
The x and y properties, for example, are not given in screen coordinates: they are always depending on the current coordinate system.
That coordinate system, in turn, is depending on your position within the display list hierarchy.
To visualize this, imagine pinning sheets of paper onto a pinboard. Each sheet represents a coordinate system with a horizontal x-axis and a vertical y-axis. The position you stick the pin through is the root of the coordinate system.

Now, when you rotate the sheet of paper, everything that is drawn onto it (e.g. image and text) will rotate with it — as do the x- and y-axes. However, the root of the coordinate system (the pin) stays where it is.
The position of the pin therefore represents the point the x- and y-coordinates of the sheet are pointing at, relative to the parent coordinate system (= the pin-board).
Keep the analogy with the pin-board in mind when you create your display hierarchy. This is a very important concept you need to understand when working with Starling.
3.2.4. Custom Display Objects
I mentioned this already: when you create an application, you split it up into logical parts. A simple game of chess might contain the board, the pieces, a pause button and a message box. All those elements will be displayed on the screen — thus, each will be represented by a class derived from DisplayObject.
Take a simple message box as an example.
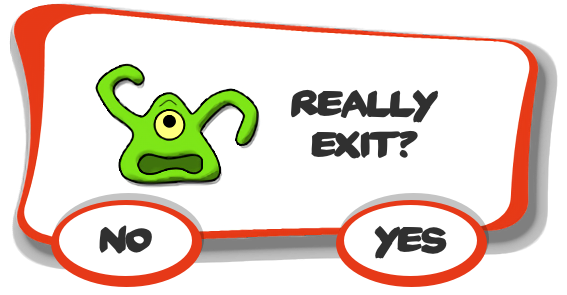
That’s actually quite similar to the speech bubble we just created; in addition to the background image and text, it also contains two buttons.
This time, instead of just grouping the object together in a sprite, we want to encapsulate it into a convenient class that hides any implementation details.
To achieve this, we create a new class that inherits from DisplayObjectContainer. In its constructor, we create everything that makes up the message box:
public class MessageBox extends DisplayObjectContainer
{
    [Embed(source = "background.png")]
    private static const BackgroundBmp:Class;

    [Embed(source = "button.png")]
    private static const ButtonBmp:Class;

    private var _background:Image;
    private var _textField:TextField;
    private var _yesButton:Button;
    private var _noButton:Button;

    public function MessageBox(text:String)
    {
        var bgTexture:Texture = Texture.fromEmbeddedAsset(BackgroundBmp);
        var buttonTexture:Texture = Texture.fromEmbeddedAsset(ButtonBmp);

        _background = new Image(bgTexture);
        _textField  = new TextField(200, 100, text);
        _noButton   = new Button(buttonTexture, "no");
        _yesButton  = new Button(buttonTexture, "yes");

        _noButton.x  = 20;
        _noButton.y  = 100;
        _yesButton.x = 120;
        _yesButton.y = 100;

        addChild(_background);
        addChild(_textField);
        addChild(_noButton);
        addChild(_yesButton);
    }
}
Now you have a simple class that contains a background image, two buttons and some text. To use it, just create an instance of MessageBox and add it to the display tree:
var msgBox:MessageBox = new MessageBox("Really exit?");
addChild(msgBox);
You can add additional methods to the class (like fadeIn and fadeOut), and code that is triggered when the user clicks one of those buttons.
This is done using Starling’s event mechanism, which is shown in a later chapter.
3.2.5. Disposing Display Objects
When you don’t want an object to be displayed any longer, you simply remove it from its parent, e.g. by calling removeFromParent().
The object will still be around, of course, and you can add it to another display object, if you want.
Oftentimes, however, the object has outlived its usefulness.
In that case, it’s a good practice to call its dispose method.
msgBox.removeFromParent();
msgBox.dispose();
When you dispose display objects, they will free up all the resources that they have allocated. That’s important, because many Stage3D related data is not reachable by the garbage collector. When you don’t dispose that data, it will stay in memory, which means that the app will sooner or later run out of resources and crash.
| When you dispose a container, all of its children will be disposed, too. |
To make things easier, removeFromParent() optionally accepts a Boolean parameter to dispose the DisplayObject that is being removed.
That way, the code from above can be simplified to this single line:
msgBox.removeFromParent(true);3.2.6. Pivot Points
Pivot Points are a feature you won’t find in the traditional display list.
In Starling, display objects contain two additional properties: pivotX and pivotY.
The pivot point of an object (also known as origin, root or anchor) defines the root of its coordinate system.
Per default, the pivot point is at (0, 0); in an image, that is the top left position.
Most of the time, this is just fine.
Sometimes, however, you want to have it at a different position — e.g. when you want to rotate an image around its center.
Without a pivot point, you’d have to wrap the object inside a container sprite in order to do that:
var image:Image = new Image(texture);

var sprite:Sprite = new Sprite(); (1)
image.x = -image.width / 2.0;
image.y = -image.height / 2.0;
sprite.addChild(image); (2)

sprite.rotation = deg2rad(45); (3)| 1 | Create a sprite. |
| 2 | Add an image so that its center is exactly on top of the sprite’s origin. |
| 3 | Rotating the sprite will rotate the image around its center. |
Most long-time Flash developers will know this trick; it was needed quite regularly. One might argue, however, that it’s a lot of code for such a simple thing. With the pivot point, the code is reduced to the following:
var image:Image = new Image(texture);
image.pivotX = image.width  / 2.0; (1)
image.pivotY = image.height / 2.0; (2)
image.rotation = deg2rad(45); (3)| 1 | Move pivotX to the horizontal center of the image. |
| 2 | Move pivotY to the vertical center of the image. |
| 3 | Rotate around the center. |
No more container sprite is needed! To stick with the analogy used in previous chapters: the pivot point defines the position where you stab the pin through the object when you attach it to its parent. The code above moves the pivot point to the center of the object.

Now that you have learned how to control the pivot point coordinates individually, let’s take a look at the method alignPivot().
It allows us to move the pivot point to the center of the object with just one line of code:
var image:Image = new Image(texture);
image.alignPivot();
image.rotation = deg2rad(45);
Handy huh?
Furthermore, if we want the pivot point somewhere else (say, at the bottom right), we can optionally pass alignment arguments to the method:
var image:Image = new Image(texture);
image.alignPivot(Align.RIGHT, Align.BOTTOM);
image.rotation = deg2rad(45);
That code rotates the object around the bottom right corner of the image.
Gotchas
Be careful: the pivot point is always given in the local coordinate system of the object.
That’s unlike the width and height properties, which are actually relative to the parent coordinate system.
That leads to surprising results when the object is e.g. scaled or rotated.
For example, think of an image that’s 100 pixels wide and scaled to 200% (image.scaleX = 2.0).
That image will now return a width of 200 pixels (twice its original width).
However, to center the pivot point horizontally, you’d still set pivotX to 50, not 100!
In the local coordinate system, the image is still 100 pixels wide — it just appears wider in the parent coordinate system.
It might be easier to understand when you look back at the code from the beginning of this section, where we centered the image within a parent sprite.
What would happen if you changed the scale of the sprite?
Would this mean that you have to update the position of the image to keep it centered?
Of course not.
The scale does not affect what’s happening inside the sprite, just how it looks from the outside.
And it’s just the same with the pivot point property.
| If you still get a headache picturing that (as it happens to me, actually), just remember to set the pivot point before changing the scale or rotation of the object. That will avoid any problems. |
3.3. Textures & Images
We came across the Image and Texture classes several times already; they are some of the most useful classes in Starling. But how are they used, and what’s the difference between the two?
3.3.1. Textures
A texture is just the data that describes an image — like the file that is saved on your digital camera. You can’t show anybody that file alone: it’s all zeros and ones, after all. You need an image viewer to look at it, or send it to a printer.
Textures are stored directly in GPU memory, which means that they can be accessed very efficiently during rendering. They are typically either created from an embedded class or loaded from a file. You can pick between one of the following file formats:
- PNG
-
The most versatile of them all. Its lossless compression works especially well for images with large areas of solid color. Recommended as default texture format.
- JPG
-
Produces smaller files than PNG for photographic (and photo-like) images, thanks to it lossy encoding method. However, the lack of an alpha channel limits its usefulness severely. Recommended only for photos and big background images.
- ATF
-
A format created especially for Stage3D. ATF textures require little texture memory and load very fast; however, their lossy compression is not perfectly suited for all kinds of images. We will look at ATF textures in more detail in a later chapter (see ATF Textures).
The starling.textures.Texture class contains a number of factory methods used to instantiate textures.
Here are few of them (for clarity, I omitted the arguments).
public class Texture
{
    static function fromColor():Texture;
    static function fromBitmap():Texture;
    static function fromBitmapData():Texture;
    static function fromEmbeddedAsset():Texture;
    static function fromCamera():Texture;
    static function fromNetStream():Texture;
    static function fromTexture():Texture;
}
Probably the most common task is to create a texture from a bitmap. That couldn’t be easier:
var bitmap:Bitmap = getBitmap();
var texture:Texture = Texture.fromBitmap(bitmap);
It’s also very common to create a texture from an embedded bitmap. That can be done in just the same way:
[Embed(source="mushroom.png")] (1)
public static const Mushroom:Class;

var bitmap:Bitmap = new Mushroom(); (2)
var texture:Texture = Texture.fromBitmap(bitmap); (3)| 1 | Embed the bitmap. |
| 2 | Instantiate the bitmap. |
| 3 | Create a texture from the bitmap. |
However, there is a shortcut that simplifies this further:
[Embed(source="mushroom.png")] (1)
public static const Mushroom:Class;

var texture:Texture = Texture.fromEmbeddedAsset(Mushroom); (2)| 1 | Embed the bitmap. |
| 2 | Create a texture right from the class storing the embedded asset. |
|
Pro Tip
This is not only less code, but it will also require less memory! The |
Another feature of the Texture class is hidden in the inconspicuous fromTexture method.
It allows you to set up a texture that points to an area within another texture.
What makes this so useful is the fact that no pixels are copied in this process. Instead, the created SubTexture stores just a reference to its parent texture. That’s extremely efficient!
var texture:Texture = getTexture();
var subTexture:Texture = Texture.fromTexture(
        texture, new Rectangle(10, 10, 41, 47));
Shortly, you will get to know the TextureAtlas class; it’s basically built exactly around this feature.
3.3.2. Images
We’ve got a couple of textures now, but we still don’t know how to display it on the screen. The easiest way to do that is by using the Image class or one of its cousins.
Let’s zoom in on that part of the family tree.
-
A Mesh is a flat collection of triangles (remember, the GPU can only draw triangles).
-
A Quad is a collection of at least two triangles spawning up a rectangle.
-
An Image is just a quad with a convenient constructor and a few additional methods.
-
A MovieClip is an image that switches textures over time.
While all of these classes are equipped to handle textures, you will probably work with the Image class most often. That’s simply because rectangular textures are the most common, and the Image class is the most convenient way to work with them.
To demonstrate, let me show you how to display a texture with a Quad vs. an Image.
var texture:Texture = Texture.fromBitmap(...);

var quad:Quad = new Quad(texture.width, texture.height); (1)
quad.texture = texture;
addChild(quad);

var image:Image = new Image(texture); (2)
addChild(image);| 1 | Create a quad with the appropriate size and assign the texture, or: |
| 2 | Create an image with its standard constructor. |
Personally, I’d always pick the approach that saves me more keystrokes. What’s happening behind the scenes is exactly the same in both cases, though.

3.3.3. One Texture, multiple Images
It’s important to note that a texture can be mapped to any number of images (meshes). In fact, that’s exactly what you should do: load a texture only once and then reuse it across the lifetime of your application.
// do NOT do this!!
var image1:Image = new Image(Texture.fromEmbeddedAsset(Mushroom));
var image2:Image = new Image(Texture.fromEmbeddedAsset(Mushroom));
var image3:Image = new Image(Texture.fromEmbeddedAsset(Mushroom));

// instead, create the texture once and keep a reference:
var texture:Texture = Texture.fromEmbeddedAsset(Mushroom));
var image1:Image = new Image(texture);
var image2:Image = new Image(texture);
var image3:Image = new Image(texture);
Almost all your memory usage will come from textures; you will quickly run out of RAM if you waste texture memory.
3.3.4. Texture Atlases
In all the previous samples, we loaded each texture separately. However, real applications should actually not do that. Here’s why.
-
For efficient GPU rendering, Starling batches the rendered Meshes together. Batch processing is disrupted, however, whenever the texture changes.
-
In some situations, Stage3D requires textures to have a width and height that are powers of two. Starling hides this limitation from you, but you will nevertheless use more memory if you do not follow that rule.
By using a texture atlas, you avoid both the texture switches and the power-of-two limitation. All textures are within one big "super-texture", and Starling takes care that the correct part of this texture is displayed.
The trick is to have Stage3D use this big texture instead of the small ones, and to map only a part of it to each quad that is rendered. This will lead to a very efficient memory usage, wasting as little space as possible. (Some other frameworks call this feature Sprite Sheets.)
Creating the Atlas
The positions of each SubTexture are defined in an XML file like this one:
<TextureAtlas imagePath="atlas.png">
 <SubTexture name="moon" x="0" y="0" width="30" height="30"/>;
 <SubTexture name="jupiter" x="30" y="0" width="65" height="78"/>;
 ...
</TextureAtlas>;
As you can see, the XML references one big texture and defines multiple named SubTextures, each pointing to an area within that texture. At runtime, you can reference these SubTextures by their name and they will act just as if they were independent textures.
But how do you combine all your textures into such an atlas? Thankfully, you don’t have to do that manually; there are lots of tools around that will help you with that task. Here are two candidates, but Google will bring up many more.
-
TexturePacker is my personal favorite. You won’t find any tool that allows for so much control over your sprite sheets, and its Starling support is excellent (ATF textures, anyone?).
-
Shoebox is a free tool built with AIR. While it doesn’t have as many options for atlas creation as TexturePacker, it contains lots of related functionality, like bitmap font creation or sprite extraction.
Using the Atlas
Okay: you’ve got a texture atlas now. But how do you use it? Let’s start with embedding the texture and XML data.
[Embed(source="atlas.xml", mimeType="application/octet-stream")] (1)
public static const AtlasXml:Class;

[Embed(source="atlas.png")] (2)
public static const AtlasTexture:Class;| 1 | Embed the atlas XML. Don’t forget to specify the mimeType. |
| 2 | Embed the atlas texture. |
| Alternatively, you can also load these files from an URL or from the disk (if we are talking about AIR). We will look at that in detail when we discuss Starling’s AssetManager. |
With those two objects available, we can create a new TextureAtlas instance and access all SubTextures through the method getTexture().
Create the atlas object once when the game is initialized and reference it throughout its lifetime.
var texture:Texture = Texture.fromEmbeddedAsset(AtlasTexture); (1)
var xml:XML = XML(new AtlasXml());
var atlas:TextureAtlas = new TextureAtlas(texture, xml);

var moonTexture:Texture = atlas.getTexture("moon"); (2)
var moonImage:Image = new Image(moonTexture);| 1 | Create the atlas. |
| 2 | Display a SubTexture. |
It’s as simple as that!
3.3.5. Render Textures
The RenderTexture class allows creating textures dynamically. Think of it as a canvas on which you can paint any display object.
After creating a render texture, just call the drawObject method to render an object directly onto the texture.
The object will be drawn onto the texture at its current position, adhering its current rotation, scale and alpha properties.
var renderTexture:RenderTexture = new RenderTexture(512, 512); (1)

var brush:Sprite = getBrush(); (2)
brush.x = 40;
brush.y = 120;
brush.rotation = 1.41;

renderTexture.draw(brush); (3)| 1 | Create a new RenderTexture with the given size (in points). It will be initialized with fully transparent pixels. |
| 2 | In this sample, we’re referencing a display object depicting a brush. We move it to a certain location. |
| 3 | The brush object will be drawn to the texture with its current position and orientation settings. |
Drawing is done very efficiently, as it is happening directly in graphics memory. After you have drawn objects onto the texture, the performance will be just like that of a normal texture — no matter how many objects you have drawn.
var image:Image = new Image(renderTexture);
addChild(image); (1)| 1 | The texture can be used like any other texture. |
If you draw lots of objects at once, it is recommended to bundle the drawing calls in a block via the drawBundled method, as shown below.
This allows Starling to skip a few rather costly operations, speeding up the process immensely.
renderTexture.drawBundled(function():void (1)
{
    for (var i:int=0; i<numDrawings; ++i)
    {
        image.rotation = (2 * Math.PI / numDrawings) * i;
        renderTexture.draw(image); (2)
    }
});| 1 | Activate bundled drawing by encapsulating all draw-calls in a function. |
| 2 | Inside the function, call draw just like before. |
You can use any display object like an eraser by setting its blend mode to BlendMode.ERASE.
That way, you can selectively remove parts of the texture.
brush.blendMode = BlendMode.ERASE;
renderTexture.draw(brush);
To wipe it completely clean, use the clear method.
|
Context Loss
Unfortunately, render textures have one big disadvantage: they lose all their contents when the render context is lost. Context Loss is discussed in detail in a later chapter; in a nutshell, it means that Stage3D may lose the contents of all its buffers in certain situations. (Yes, that is as nasty as it sounds.) Thus, if it is really important that the texture’s contents is persistent (i.e. it’s not just eye candy), you will need to make some arrangements. We will look into possible strategies in the mentioned chapter — I just wanted to mention this fact here so it doesn’t hit you by surprise. |
3.4. Dynamic Text
Text is an important part of every application. You can only convey so much information with images; some things simply need to be described with words, dynamically at run-time.
3.4.1. TextFields
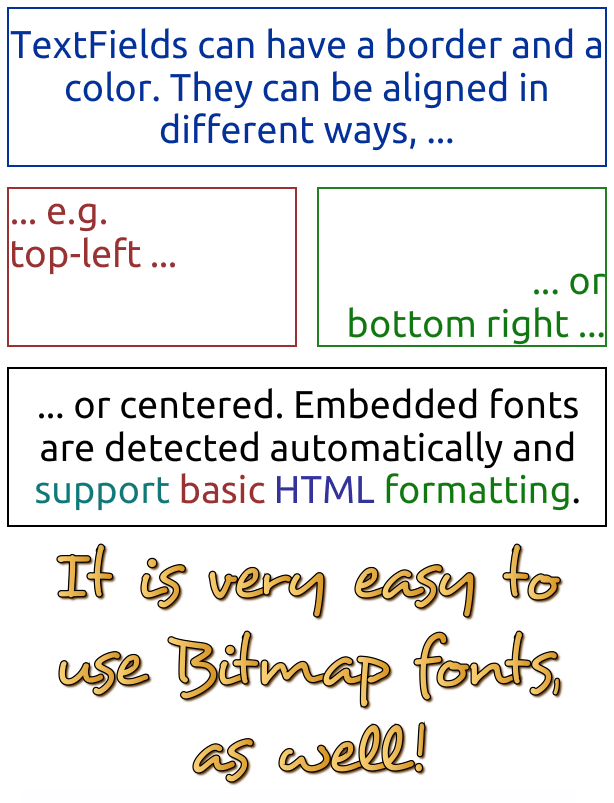
Starling makes it easy to display dynamic text. The TextField class should be quite self explanatory!
var textField:TextField = new TextField(100, 20, "text"); (1)
textField.format.setTo("Arial", 12, Color.RED); (2)
textField.format.horizontalAlign = Align.RIGHT; (3)
textField.border = true; (4)| 1 | Create a TextField with a size of 100×20 points, displaying the text "text". |
| 2 | We set the format to "Arial" with a size of 12 points, in red. |
| 3 | The text is aligned to the right. |
| 4 | The border property is mainly useful during development: it will show the boundaries of the TextField. |
Note that the style of the text is set up via the format property, which points to a starling.text.TextFormat instance.
|
Once created, you can use a TextField just like you’d use an image or quad.
3.4.2. TrueType Fonts
Per default, Starling will use system fonts to render text. For example, if you set up your TextField to use "Arial", it will use the one installed on the system (if it is).
However, the rendering quality of that approach is not optimal; for example, the font might be rendered without anti-aliasing.
For a better output, you should embed your TrueType fonts directly into the SWF file. Use the following code to do that:
[Embed(source="Arial.ttf", embedAsCFF="false", fontFamily="Arial")]
private static const Arial:Class; (1)

[Embed(source="Arial Bold.ttf", embedAsCFF="false", fontFamily="Arial", fontWeight="bold")]
private static const ArialBold:Class; (2)

[Embed(source="Arial Italic.ttf", embedAsCFF="false", fontFamily="Arial", fontStyle="italic")]
private static const ArialItalic:Class; (3)

[Embed(source="Arial.ttf", embedAsCFF="false", fontFamily="Arial", unicodeRange = "U+0020-U+007e")]
private static const ArialJustLatin:Class; (4)| 1 | Embedding the standard Arial font. Note the embedAsCFF part: don’t skip it! Otherwise, the font simply won’t show up. |
| 2 | Bold and italic styles must be embedded separately. Note the fontWeight attribute here, |
| 3 | and the fontStyle attribute here. |
| 4 | You can also define which glyphs to include, which is useful for big fonts when you don’t need all Unicode letters. The range shown here is for basic Latin (upper- and lowercase chars, numerals and common symbols/punctuations). |
After embedding the font, any TextField that is set up with a corresponding font name (font family) and weight will use it automatically. There’s nothing else to set up or configure.
| Beware of the big footprint when embedding all glyphs of a font. The "unicodeRange" shown above mitigates this problem. You can generate the ranges using e.g. Unicode Range Generator. |
If your text is clipped or does not appear at the correct position, have a look at your current stage.quality setting.
A low quality value often causes Flash/AIR to report incorrect values regarding the text bounds, and Starling depends on those values when it draws the text.
(I’m talking about the Flash stage here; and this applies only to TrueType fonts.)
|
3.4.3. Bitmap Fonts
Using TrueType fonts as shown above is adequate for text that does not change very often. However, if your TextField constantly changes its contents, or if you want to display a fancy font that’s not available in TrueType format, you should use a bitmap font instead.
A bitmap font is a texture containing all the characters you want to display. Similar to a TextureAtlas, an XML file stores the positions of the glyphs inside the texture.
This is all Starling needs to render bitmap fonts. To create the necessary files, there are several options:
-
Littera, a full-featured free online bitmap font generator.
-
Bitmap Font Generator, a tool provided by AngelCode that lets you create a bitmap font out of any TrueType font. It is, however, only available for Windows.
-
Glyph Designer for macOS, an excellent tool that allows you to add fancy special effects to your fonts.
-
bmGlyph, also exclusive for macOS, available on the App Store.
The tools are all similar to use, allowing you to pick one of your system fonts and optionally apply some special effects. On export, there are a few things to consider:
-
Starling requires the XML variant of the
.fntformat. -
Make sure to pick the right set of glyphs; otherwise, your font texture will grow extremely big.
The result is a .fnt file and an associated texture containing the characters.

To make such a font available to Starling, you can embed it in the SWF and register it at the TextField class.
[Embed(source="font.png")]
public static const FontTexture:Class;

[Embed(source="font.fnt", mimeType="application/octet-stream")]
public static const FontXml:Class;

var texture:Texture = Texture.fromEmbeddedAsset(FontTexture);
var xml:XML = XML(new FontXml());
var font:BitmapFont = new BitmapFont(texture, xml); (1)

TextField.registerCompositor(font, font.name); (2)| 1 | Create an instance of the BitmapFont class. |
| 2 | Register the font at the TextField class. |
Once the bitmap font instance has been registered at the TextField class, you don’t need it any longer. Starling will simply pick up that font when it encounters a TextField that uses a font with that name. Like here:
var textField:TextField = new TextField(100, 20, "Hello World");
textField.format.font = "fontName"; (1)
textField.format.size = BitmapFont.NATIVE_SIZE; (2)| 1 | To use the font, simply reference it by its name. By default, that’s what is stored in the face attribute within the XML file. |
| 2 | Bitmap fonts look best when they are displayed in the exact size that was used to create the font texture. You could assign that size manually — but it’s smarter to let Starling do that, via the NATIVE_SIZE constant. |
Gotchas
There’s one more thing you need to know: if your bitmap font uses just a single color (like a normal TrueType font, without any color effects), your glyphs need to be exported in pure white.
The format.color property of the TextField can then be used to tint the font into an arbitrary color at runtime (simply by multiplication with the RGB channels of the texture).
On the other hand, if your font does contains colors (like the sample image above), it’s the TextField’s format.color property that needs to be set to white (Color.WHITE).
That way, the color tinting of the TextField will not affect the texture color.
|
For optimal performance, you can even add bitmap fonts to your texture atlas! That way, your texts may be batched together with regular images, reducing draw calls even more. To do that, simply add the font’s PNG image to your atlas, just like the other textures.
Then initialize the bitmap font with the SubTexture from the atlas and the regular When you support multiple scale factors (a concept we will look at in the Mobile Development chapter), the process becomes a little difficult, though. You cannot simply create one high resolution font and have the atlas generator scale it down; this would result in occasional graphical glitches. Each scaled font must be created separately by the bitmap font creator. |
The MINI Font
Starling actually comes with one very lightweight bitmap font included. It probably won’t win any beauty contests — but it’s perfect when you need to display text in a prototype, or maybe for some debug output.

When I say lightweight, I mean it: each letter is only 5 pixels high. There is a trick, though, that will scale it up to exactly 200% its native size.
var textField:TextField = new TextField(100, 10, "The quick brown fox ...");
textField.format.font = BitmapFont.MINI; (1)
textField.format.size = BitmapFont.NATIVE_SIZE * 2; (2)| 1 | Use the MINI font. |
| 2 | Use exactly twice the native size. Since the font uses nearest neighbor scaling, it will stay crisp! |
3.5. Event Handling
You can think of events as occurrences of any kind that are of interest to you as a programmer.
-
For example, a mobile app might notify you that the device orientation has changed, or that the user just touched the screen.
-
On a lower level, a button might indicate that it was triggered, or a knight that he has run out of health points.
That’s what Starling’s event mechanism is for.
3.5.1. Motivation
The event mechanism is a key feature of Starling’s architecture. In a nutshell, events allow objects to communicate with each other.
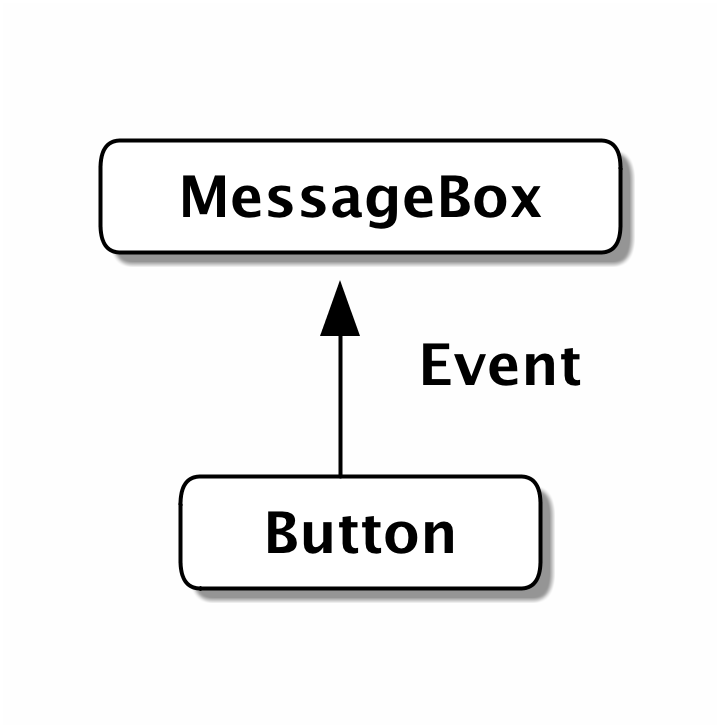
You might think: we already have a mechanism for that — methods! That’s true, but methods only work in one direction. For example, look at a MessageBox that contains a Button.
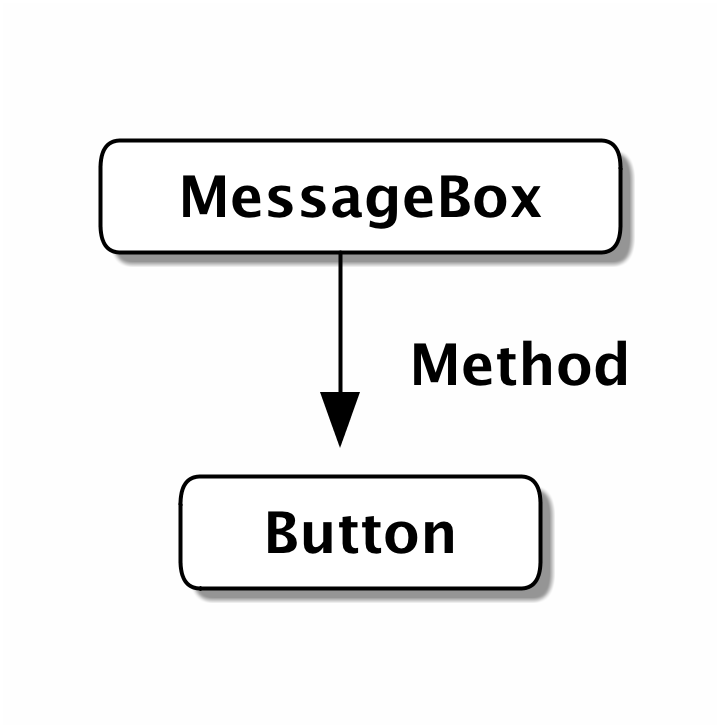
The message box owns the button, so it can use its methods and properties, e.g.
public class MessageBox extends DisplayObjectContainer
{
    private var _yesButton:Button;

    private function disableButton():void
    {
        _yesButton.enabled = false; (1)
    }
}| 1 | Communicate with the Button via a property. |
The Button instance, on the other hand, does not own a reference to the message box. After all, a button can be used by any component — it’s totally independent of the MessageBox class. That’s a good thing, because otherwise, you could only use buttons inside message boxes, and nowhere else. Ugh!
Still: the button is there for a reason — if triggered, it needs to tell somebody about it! In other words: the button needs to be able to send messages to its owner, whoever that is.
3.5.2. Event & EventDispatcher
I have something to confess: when I showed you the class hierarchy of Starling’s display objects, I omitted the actual base class: EventDispatcher.

This class equips all display objects with the means to dispatch and handle events. It’s not a coincidence that all display objects inherit from EventDispatcher; in Starling, the event system is tightly integrated with the display list. This has some advantages we will see later.
Events are best described by looking at an example.
Imagine for a moment that you’ve got a dog; let’s call him Einstein. Several times each day, Einstein will indicate to you that he wants to go out for a walk. He does so by barking.
class Dog extends Sprite
{
    function advanceTime():void
    {
        if (timeToPee)
        {
            var event:Event = new Event("bark"); (1)
            dispatchEvent(event); (2)
        }
    }
}

var einstein:Dog = new Dog();
einstein.addEventListener("bark", onBark); (3)

function onBark(event:Event):void (4)
{
    einstein.walk();
}| 1 | The string bark will identify the event. It’s encapsulated in an Event instance. |
| 2 | Dispatching event will send it to everyone who subscribed to bark events. |
| 3 | Here, we do subscribe by calling addEventListener. The first argument is the event type, the second the listener (a function). |
| 4 | When the dog barks, this method will be called with the event as parameter. |
You just saw the three main components of the event mechanism:
-
Events are encapsulated in instances of the Event class (or subclasses thereof).
-
To dispatch an event, the sender calls dispatchEvent, passing the Event instance along.
-
To listen to an event, the client calls addEventListener, indicating which type of event he is interested in and the function or method to be called.
From time to time, your aunt takes care of the dog. When that happens, you don’t mind if the dog barks — your aunt knows what she signed up for! So you remove the event listener, which is a good practice not only for dog owners, but also for Starling developers.
einstein.removeEventListener("bark", onBark); (1)
einstein.removeEventListeners("bark"); (2)| 1 | This removes the specific onBark listener. |
| 2 | This removes all listeners of that type. |
So much for the bark event.
Of course, Einstein could dispatch several different event types, for example howl or growl events.
It’s recommended to store such strings in static constants, e.g. right in the Dog class.
class Dog extends Sprite
{
    public static const BARK:String = "bark";
    public static const HOWL:String = "howl";
    public static const GROWL:String = "growl";
}

einstein.addEventListener(Dog.GROWL, burglar.escape);
einstein.addEventListener(Dog.HOWL, neighbor.complain);
Starling predefines several very useful event types right in the Event class. Here’s a selection of the most popular ones:
-
Event.TRIGGERED: a button was triggered
-
Event.ADDED: a display object was added to a container
-
Event.ADDED_TO_STAGE: a display object was added to a container that is connected to the stage
-
Event.REMOVED: a display object was removed from a container
-
Event.REMOVED_FROM_STAGE: a display object lost its connection to the stage
-
Event.ENTER_FRAME: some time has passed, a new frame is rendered (we’ll get to that later)
-
Event.COMPLETE: something (like a MovieClip instance) just finished
3.5.3. Custom Events
Dogs bark for different reasons, right? Einstein might indicate that he wants to pee, or that he is hungry. It might also be a way to tell a cat that it’s high time to make an exit.
Dog people will probably hear the difference (I’m a cat person; I won’t). That’s because smart dogs set up a BarkEvent that stores their intent.
public class BarkEvent extends Event
{
    public static const BARK:String = "bark"; (1)

    private var _reason:String; (2)

    public function BarkEvent(type:String, reason:String, bubbles:Boolean=false)
    {
        super(type, bubbles); (3)
        _reason = reason;
    }

    public function get reason():Boolean { return _reason; } (4)
}| 1 | It’s a good practice to store the event type right at the custom event class. |
| 2 | The reason for creating a custom event: we want to store some information with it. Here, that’s the reason String. |
| 3 | Call the super class in the constructor. (We will look at the meaning of bubbles shortly.) |
| 4 | Make reason accessible via a property. |
The dog can now use this custom event when barking:
class Dog extends Sprite
{
    function advanceTime():void
    {
        var reason:String = this.hungry ? "hungry" : "pee";
        var event:BarkEvent = new BarkEvent(BarkEvent.BARK, reason);
        dispatchEvent(event);
    }
}

var einstein:Dog = new Dog();
einstein.addEventListener(BarkEvent.BARK, onBark);

function onBark(event:BarkEvent):void (1)
{
    if (event.reason == "hungry") (2)
        einstein.feed();
    else
        einstein.walk();
}| 1 | Note that the parameter is of type BarkEvent. |
| 2 | That’s why we can now access the reason property and act accordingly. |
That way, any dog owners familiar with the BarkEvent will finally be able to truly understand their dog. Quite an accomplishment!
3.5.4. Simplifying
Agreed: it’s a little cumbersome to create that extra class just to be able to pass on that reason string.
After all, it’s very often just a single piece of information we are interested in.
Having to create additional classes for such a simple mechanism feels somewhat inefficient.
That’s why you won’t actually need the subclass-approach very often.
Instead, you can make use of the data property of the Event class, which can store arbitrary references (its type: Object).
Replace the BarkEvent logic with this:
// create & dispatch event
var event:Event = new Event(Dog.BARK);
event.data = "hungry"; (1)
dispatchEvent(event);

// listen to event
einstein.addEventListener(Dog.BARK, onBark);
function onBark(event:Event):void
{
    trace("reason: " + event.data as String); (2)
}| 1 | Store the reason for barking inside the data property. |
| 2 | To get the reason back, cast data to String. |
The downside of this approach is that we lose some type-safety. But in my opinion, I’d rather have that cast to String than implement a complete class.
Furthermore, Starling has a few shortcuts that simplify this code further! Look at this:
// create & dispatch event
dispatchEventWith(Dog.BARK, false, "hungry"); (1)

// listen to event
einstein.addEventListener(Dog.BARK, onBark);
function onBark(event:Event, reason:String):void
{
    trace("reason: " + reason); (2)
}| 1 | Creates an event of type Dog.BARK, populates the data property, and dispatches the event — all in one line. |
| 2 | The data property is passed to the (optional) second argument of the event handler. |
We got rid of quite an amount of boiler plate code that way! Of course, you can use the same mechanism even if you don’t need any custom data. Let’s look at the most simple event interaction possible:
// create & dispatch event
dispatchEventWith(Dog.HOWL); (1)

// listen to event
dog.addEventListener(Dog.HOWL, onHowl);
function onHowl():void (2)
{
    trace("hoooh!");
}| 1 | Dispatch an event by only specifying its type. |
| 2 | Note that this function doesn’t contain any parameters! If you don’t need them, there’s no need to specify them. |
The simplified dispatchEventWith call is actually even more memory efficient, since Starling will pool the Event objects behind the scenes.
|
3.5.5. Bubbling
In our previous examples, the event dispatcher and the event listener were directly connected via the addEventListener method.
But sometimes, that’s not what you want.
Let’s say you created a complex game with a deep display list.
Somewhere in the branches of this list, Einstein (the protagonist-dog of this game) ran into a trap.
He howls in pain, and in his final breaths, dispatches a GAME_OVER event.
Unfortunately, this information is needed far up the display list, in the game’s root class. On such an event, it typically resets the level and returns the dog to its last save point. It would be really cumbersome to hand this event up from the dog over numerous display objects until it reaches the game root.
That’s a very common requirement — and the reason why events support something that is called bubbling.
Imagine a real tree (it’s your display list) and turn it around by 180 degrees, so that the trunk points upwards. The trunk, that’s your stage, and the leaves of the tree are your display objects. Now, if a leaf creates a bubbling event, that event will move upwards just like the bubbles in a glass of soda, traveling from branch to branch (from parent to parent) until it finally reaches the trunk.
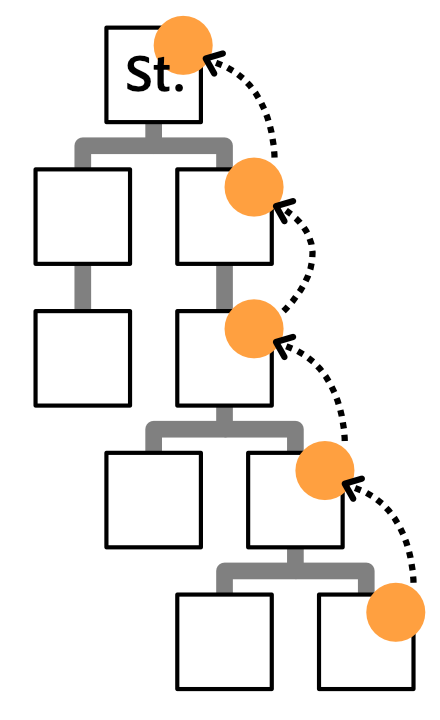
Any display object along this route can listen to this event.
It can even pop the bubble and stop it from traveling further. All that is required to do that is to set the bubbles property of an event to true.
// classic approach:
var event:Event = new Event("gameOver", true); (1)
dispatchEvent(event);

// one-line alternative:
dispatchEventWith("gameOver", true); (2)| 1 | Passing true as second parameter of the Event constructor activates bubbling. |
| 2 | Alternatively, dispatchEventWith takes the exact same parameters. |
Anywhere along its path, you can listen to this event, e.g. on the dog, its parent, or the stage:
dog.addEventListener("gameOver", onGameOver);
dog.parent.addEventListener("gameOver", onGameOver);
stage.addEventListener("gameOver", onGameOver);
This feature comes in handy in numerous situations; especially when it comes to user input via mouse or touch screen.
3.5.6. Touch Events
While typical desktop computers are controlled with a mouse, most mobile devices, like smartphones or tablets, are controlled with your fingers.
Starling unifies those input methods and treats all "pointing-device" input as TouchEvent.
That way, you don’t have to care about the actual input method your game is controlled with.
Whether the input device is a mouse, a stylus, or a finger: Starling will always dispatch touch events.
First things first: if you want to support multitouch, make sure to enable it before you create your Starling instance.
Starling.multitouchEnabled = true;

var starling:Starling = new Starling(Game, stage);
starling.simulateMultitouch = true;
Note the property simulateMultitouch.
If you enable it, you can simulate multitouch input with your mouse on your development computer.
Press and hold the Ctrl or Cmd keys (Windows or Mac) when you move the mouse cursor around to try it out.
Add Shift to change the way the alternative cursor is moving.
To react to touch events (real or simulated), you need to listen for events of the type TouchEvent.TOUCH.
sprite.addEventListener(TouchEvent.TOUCH, onTouch);You might have noticed that I’ve just added the event listener to a Sprite instance. Sprite, however, is a container class; it doesn’t have any tangible surface itself. Is it even possible to touch it, then?
Yes, it is — thanks to bubbling.
To understand that, think back to the MessageBox class we created a while ago. When the user clicks on its text field, anybody listening to touches on the text field must be notified — so far, so obvious. But the same is true for somebody listening for touch events on the message box itself; the text field is part of the message box, after all. Even if somebody listens to touch events on the stage, he should be notified. Touching any object in the display list means touching the stage!
Thanks to bubbling events, Starling can easily represent this type of interaction. When it detects a touch on the screen, it figures out which leaf object was touched. It creates a TouchEvent and dispatches it on that object. From there, it will bubble up along the display list.
Touch Phases
Time to look at an actual event listener:
private function onTouch(event:TouchEvent):void
{
    var touch:Touch = event.getTouch(this, TouchPhase.BEGAN);
    if (touch)
    {
        var localPos:Point = touch.getLocation(this);
        trace("Touched object at position: " + localPos);
    }
}
That’s the most basic case: Find out if somebody touched the screen and trace out the coordinates.
The method getTouch is provided by the TouchEvent class and helps you find the touches you are interested in.
| The Touch class encapsulates all information of a single touch: where it occurred, where it was in the previous frame, etc. |
As first parameter, we passed this to the getTouch method.
Thus, we’re asking the event to return any touches that occurred on this or its children.
Touches go through a number of phases within their lifetime:
TouchPhase.HOVER
|
Only for mouse input; dispatched when the cursor moves over the object with the mouse button up. |
TouchPhase.BEGAN
|
The finger just hit the screen, or the mouse button was pressed. |
TouchPhase.MOVED
|
The finger moves around on the screen, or the mouse is moved while the button is pressed. |
TouchPhase.STATIONARY
|
The finger or mouse (with pressed button) has not moved since the last frame. |
TouchPhase.ENDED
|
The finger was lifted from the screen or from the mouse button. |
Thus, the sample above (which looked for phase BEGAN) will write trace output at the exact moment the finger touches the screen, but not while it moves around or leaves the screen.
Multitouch
In the sample above, we only listened to single touches (i.e. one finger only).
Multitouch is handled very similarly; the only difference is that you call touchEvent.getTouches instead (note the plural).
var touches:Vector.<Touch> = event.getTouches(this, TouchPhase.MOVED);

if (touches.length == 1)
{
    // one finger touching (or mouse input)
    var touch:Touch = touches[0];
    var movement:Point = touch.getMovement(this);
}
else if (touches.length >= 2)
{
    // two or more fingers touching
    var touch1:Touch = touches[0];
    var touch2:Touch = touches[1];
    // ...
}
The getTouches method returns a vector of touches.
We can base our logic on the length and contents of that vector.
-
In the first if-clause, only a single finger is on the screen. Via
getMovement, we could e.g. implement a drag-gesture. -
In the else-clause, two fingers are on the screen. By accessing both touch objects, we could e.g. implement a pinch-gesture.
| The demo application that’s part of the Starling download contains the TouchSheet class, which is used in the Multitouch scene. It shows a sample implementation of a touch handler that allows dragging, rotation and scaling a sprite. |
Mouse Out and End Hover
There’s a special case to consider when you want to detect that a mouse was moved away from an object (with the mouse button in "up"-state). (This is only relevant for mouse input.)
If the target of a hovering touch changed, a TouchEvent is dispatched to the previous target to notify it that it’s no longer being hovered over.
In this case, the getTouch method will return null.
Use that knowledge to catch what could be called a mouse out event.
var touch:Touch = event.getTouch(this);
if (touch == null)
    resetButton();
3.6. Animations
Animations are not only a fundamental part of any game; even modern business apps are expected to provide smooth and dynamic transitions. Some well placed animations go a long way towards providing a responsive and intuitive interface. To help with that, Starling offers a very flexible animation engine.
If you think about it, there are two types of animations.
-
On the one hand, you’ve got animations that are so dynamic that you don’t know beforehand what exactly will happen. Think of an enemy that’s moving towards the player: its direction and speed need to be updated each frame, depending on the environment. Or physics: each additional force or collision changes everything.
-
Then there are animations that follow a meticulous plan; you know from the beginning exactly what will happen. Think of fading in a message box or transitioning from one screen to another.
We will look at both of these types in the following sections.
3.6.1. EnterFrameEvent
In some game engines, you have what is called a run-loop. That’s an endless loop which constantly updates all elements of the scene.
In Starling, due to the display list architecture, such a run loop would not make much sense. You separated your game into numerous different custom display objects, and each should know for itself what to do when some time has passed.
That’s exactly the point of the EnterFrameEvent: allowing a display object to update itself over time. Every frame, that event is dispatched to all display objects that are part of the display list. Here is how you use it:
public function CustomObject()
{
    addEventListener(EnterFrameEvent.ENTER_FRAME, onEnterFrame); (1)
}

private function onEnterFrame(event:EnterFrameEvent):void (2)
{
    trace("Time passed since last frame: " + event.passedTime);
    bird.advanceTime(passedTime);
}| 1 | You can add a listener to this event anywhere, but the constructor is a good candidate. |
| 2 | That’s what the corresponding event listener looks like. |
The method onEnterFrame is called once per frame, and it’s passed along the exact time that has elapsed since the previous frame.
With that information, you can move your enemies, update the height of the sun, or do whatever else is needed.
The power behind this event is that you can do completely different things each time it occurs. You can dynamically react to the current state of the game.
For example, you could let an enemy take one step towards the player; a simple form of enemy AI, if you will!
3.6.2. Tweens
Now to predefined animations.
They are very common and have names such as movement, scale, fade, etc.
Starling’s approach on these kinds of animations is simple — but at the same time very flexible.
Basically, you can animate any property of any object, as long as it is numeric (Number, int, uint).
Those animations are described in an object called Tween.
| The term "Tween" comes from hand drawn animations, where a lead illustrator would draw important key frames, while the rest of the team drew the frames in-between those frames. |

Enough theory, let’s go for an example:
var tween:Tween = new Tween(ball, 0.5);

tween.animate("x", 20);
tween.animate("scale", 2.0);
tween.animate("alpha", 0.0);
This tween describes an animation that moves the ball object to x = 20, scales it to twice its size and reduces its opacity until it is invisible.
All those changes will be carried out simultaneously over the course of half a second.
The start values are simply the current values of the specified properties.
This sample showed us that
-
you can animate arbitrary properties of an object, and that
-
you can combine multiple animations in one tween object.
Apropos: since scaling, fading and movement are done so frequently, the Tween class provides specific methods for that, too. So you can write the following instead:
tween.moveTo(20, 0); // animate "x" and "y"
tween.scaleTo(2);    // animate "scale"
tween.fadeTo(0);     // animate "alpha"
An interesting aspect of tweens is that you can change the way the animation is executed, e.g. letting it start slow and get faster over time. That’s done by specifying a transition type.

linear, was omitted.The following example shows how to specify such a transition and introduces a few more tricks the class is capable of.
var tween:Tween = new Tween(ball, 0.5, Transitions.EASE_IN); (1)
tween.onStart    = function():void { /* ... */ };
tween.onUpdate   = function():void { /* ... */ }; (2)
tween.onComplete = function():void { /* ... */ };
tween.delay = 2; (3)
tween.repeatCount = 3; (4)
tween.reverse = true;
tween.nextTween = explode; (5)| 1 | Specify the transition via the third constructor argument. |
| 2 | These callbacks are executed when the tween has started, each frame, or when it has finished, respectively. |
| 3 | Wait two seconds before starting the animation. |
| 4 | Repeat the tween three times, optionally in yoyo-style (reverse). If you set repeatCount to zero, the tween will be repeated indefinitely. |
| 5 | Specify another tween to start right after this one is complete. |
We just created and configured a tween — but nothing is happening yet. A tween object describes the animation, but it does not execute it.
You could do that manually via the tweens advanceTime method:
ball.x = 0;
tween = new Tween(ball, 1.0);
tween.animate("x", 100);

tween.advanceTime(0.25); // -> ball.x =  25
tween.advanceTime(0.25); // -> ball.x =  50
tween.advanceTime(0.25); // -> ball.x =  75
tween.advanceTime(0.25); // -> ball.x = 100
Hm, that works, but it’s a little cumbersome, isn’t it?
Granted, one could call advanceTime in an ENTER_FRAME event handler, but still: as soon as you’ve got more than one animation, it’s bound to become tedious.
Don’t worry: I know just the guy for you. He’s really good at handling such things.
3.6.3. Juggler
The juggler accepts and executes any number of animatable objects.
Like any true artist, it will tenaciously pursue its true passion, which is: continuously calling advanceTime on everything you throw at it.
There is always a default juggler available on the active Starling instance. The easiest way to execute an animation is through the line below — just add the animation (tween) to the default juggler and you are done.
Starling.juggler.add(tween);When the tween has finished, it will be thrown away automatically. In many cases, that simple approach will be all you need!
In other cases, though, you need a little more control. Let’s say your stage contains a game area where the main action takes place. When the user clicks on the pause button, you want to pause the game and show an animated message box, maybe providing an option to return to the menu.
When that happens, the game should freeze completely: none of its animations should be advanced any longer. The problem: the message box itself uses some animations too, so we can’t just stop the default juggler.
In such a case, it makes sense to give the game area its own juggler. As soon as the exit button is pressed, this juggler should just stop animating anything. The game will freeze in its current state, while the message box (which uses the default juggler, or maybe another one) animates just fine.
When you create a custom juggler, all you have to do is call its advanceTime method in every frame.
I recommend using jugglers the following way:
public class Game (1)
{
    private var _gameArea:GameArea;

    private function onEnterFrame(event:Event, passedTime:Number):void
    {
        if (activeMsgBox)
            trace("waiting for user input");
        else
            _gameArea.advanceTime(passedTime); (2)
    }
}

public class GameArea
{
    private var _juggler:Juggler; (3)

    public function advanceTime(passedTime:Number):void
    {
        _juggler.advanceTime(passedTime); (4)
    }
}| 1 | In your Game’s root class, listen to Event.ENTER_FRAME. |
| 2 | Advance the gameArea only when there is no active message box. |
| 3 | The GameArea contains its own juggler. It will manage all in-game animations. |
| 4 | The juggler is advanced in its advanceTime method (called by Game). |
That way, you have neatly separated the animations of the game and the message box.
By the way: the juggler is not restricted to Tweens. As soon as a class implements the IAnimatable interface, you can add it to the juggler. That interface has only one method:
function advanceTime(time:Number):void;By implementing this method, you could e.g. create a simple MovieClip-class yourself.
In its advanceTime method, it would constantly change the texture that is displayed.
To start the movie clip, you’d simply add it to a juggler.
|
This also opens up another strategy for handling custom jugglers. Since the Juggler class implements IAnimatable as well, jugglers can be added to other jugglers! That way, you don’t have to set up any |
This leaves one question, though: when and how is an object removed from the juggler?
Stopping Animations
When a tween finishes, it is removed from the juggler automatically. If you want to abort the animation before it is finished, you simply remove it from the juggler.
Let’s say you just created a tween that animates a ball and added it to the default juggler:
tween:Tween = new Tween(ball, 1.5);
tween.moveTo(x, y);
Starling.juggler.add(tween);
There are several ways you can abort that animation. Depending on the circumstances, simply pick the one that suits your game logic best.
var animID:uint = Starling.juggler.add(tween);

Starling.juggler.remove(tween); (1)
Starling.juggler.removeTweens(ball); (2)
Starling.juggler.removeByID(animID); (3)
Starling.juggler.purge(); (4)| 1 | Remove the tween directly. This works with any IAnimatable object. |
| 2 | Remove all tweens that affect the ball. Only works for tweens! |
| 3 | Remove the tween by its ID. Useful when you don’t have access to the Tween instance. |
| 4 | If you want to abort everything, purge the juggler. |
Be a little careful with the purge method, though: if you call it on the default juggler, another part of your code might suddenly be faced with an aborted animation, bringing the game to a halt.
I recommend you use purge only on your custom jugglers.
Automatic Removal
You might have asked yourself how the Tween class manages to have tweens removed from the juggler automatically once they are completed.
That’s done with the REMOVE_FROM_JUGGLER event.
Any object that implements IAnimatable can dispatch such an event; the juggler listens to those events and will remove the object accordingly.
public class MyAnimation extends EventDispatcher implements IAnimatable
{
    public function stop():void
    {
        dispatchEventWith(Event.REMOVE_FROM_JUGGLER);
    }
}
Single-Command Tweens
While the separation between tween and juggler is very powerful, it sometimes just stands in the way, forcing you to write a lot of code for simple tasks. That’s why there is a convenience method on the juggler that allows you to create and execute a tween with a single command. Here’s a sample:
juggler.tween(msgBox, 0.5, {
   transition: Transitions.EASE_IN,
   onComplete: function():void { button.enabled = true; },
   x: 300,
   rotation: deg2rad(90)
});
This will create a tween for the msgBox object with a duration of 0.5 seconds, animating both the x and rotation properties.
As you can see, the {} parameter is used to list all the properties you want to animate, as well as the properties of the Tween itself.
A huge time-saver!
3.6.4. Delayed Calls
Technically, we have now covered all the animation types Starling supports. However, there’s actually another concept that’s deeply connected to this topic.
Remember Einstein, our dog-hero who introduced us to the event system?
The last time we saw him, he had just lost all his health points and was about to call gameOver.
But wait: don’t call that method immediately — that would end the game too abruptly.
Instead, call it with a delay of, say, two seconds (time enough for the player to realize the drama that is unfolding).
To implement that delay, you could use a native Timer or the setTimeout method.
However, you can also use the juggler, and that has a huge advantage: you remain in full control.
It becomes obvious when you imagine that the player hits the "Pause" button right now, before those two seconds have passed.
In that case, you not only want to stop the game area from animating; you want this delayed gameOver call to be delayed even more.
To do that, make a call like the following:
juggler.delayCall(gameOver, 2);The gameOver function will be called two seconds from now (or longer if the juggler is disrupted).
It’s also possible to pass some arguments to that method.
Want to dispatch an event instead?
juggler.delayCall(dispatchEventWith, 2, "gameOver");Another handy way to use delayed calls is to perform periodic actions. Imagine you want to spawn a new enemy once every three seconds.
juggler.repeatCall(spawnEnemy, 3);|
Behind the scenes, both |
To abort a delayed call, use one of the following methods:
var animID:uint = juggler.delayCall(gameOver, 2);

juggler.removeByID(animID);
juggler.removeDelayedCalls(gameOver);
3.6.5. Movie Clips
You might have noticed the MovieClip class already when we looked at the class diagram surrounding Mesh. That’s right: a MovieClip is actually just a subclass of Image that changes its texture over time. Think of it as Starling’s equivalent of an animated GIF!
Acquiring Textures
It is recommended that all frames of your movie clip are from one texture atlas, and that all of them have the same size (if they have not, they will be stretched to the size of the first frame). You can use tools like Adobe Animate to create such an animation; it can export directly to Starling’s texture atlas format.
This is a sample of a texture atlas that contains the frames of a movie clip.
First, look at the XML with the frame coordinates.
Note that each frame starts with the prefix flight_.
<TextureAtlas imagePath="atlas.png">
    <SubTexture name="flight_00" x="0"   y="0" width="50" height="50" />
    <SubTexture name="flight_01" x="50"  y="0" width="50" height="50" />
    <SubTexture name="flight_02" x="100" y="0" width="50" height="50" />
    <SubTexture name="flight_03" x="150" y="0" width="50" height="50" />
    <!-- ... -->
</TextureAtlas>
Here is the corresponding texture:

Creating the MovieClip
Now let’s create the MovieClip.
Supposing that the atlas variable points to a TextureAtlas containing all our frames, that’s really easy.
var frames:Vector.<Texture> = atlas.getTextures("flight_"); (1)
var movie:MovieClip = new MovieClip(frames, 10); (2)
addChild(movie);

movie.play();
movie.pause(); (3)
movie.stop();

Starling.juggler.add(movie); (4)| 1 | The getTextures method returns all textures starting with a given prefix, sorted alphabetically. |
| 2 | That’s ideal for our MovieClip, because we can pass those textures right to its constructor. The second parameter depicts how many frames will be played back per second. |
| 3 | Those are the methods controlling playback of the clip. It will be in "play" mode per default. |
| 4 | Important: just like any other animation in Starling, the movie clip needs to be added to the juggler! |
Did you notice how we referenced the textures from the atlas by their prefix flight_?
That allows you to create a mixed atlas that contains other movie clips and textures, as well.
To group the frames of one clip together, you simply use the same prefix for all of them.
The class also supports executing a sound or an arbitrary callback whenever a certain frame is reached. Be sure to check out its API reference to see what’s possible!
More Complex Movies
A downside of this animation technique has to be mentioned, though: you will quickly run out of texture memory if your animations are either very long or if the individual frames are very big. If your animations take up several big texture atlases, they might not fit into memory.
For these kinds of animations, you need to switch to a more elaborate solution: skeletal animation. This means that a character is split up into different parts (bones); those parts are then animated separately (according to the character’s skeleton). This is extremely flexible.
Support for such animations isn’t part of Starling itself, but there are several other tools and libraries coming to the rescue. All of the following work really well with Starling:
While Spine is a standalone application (built specifically with game development in mind), the others are all based on Adobe Animate (either via plug-in or by parsing SWF data).
Apropos Adobe Animate: a recent update actually added a brand-new export option. To use it, right-click on a symbol in the Library panel and choose "Generate Texture Atlas". Don’t be fooled by the misleading name: this format has nothing to do with Starling’s standard texture atlases. It’s a completely different format that efficiently describes animations.
Best of all, loading these animations in Starling is really easy if you add this extension to your project. Once the data is loaded (which is taken care of by a custom AssetManager), you can instantiate Animation objects that work just like the MovieClip class we just encountered. Creative Cloud users should definitely give this a try!

3.7. Asset Management
One thing should be clear by now: textures make up a big part of every application’s resources. Especially when we are talking about games, there is a lot to manage; from the user interface to the characters, items, backgrounds, etc. But that’s not all: you will probably need to deal with sounds and configuration files, too.
For referencing these assets, you’ve got several choices.
-
Embed them right inside the application (via the
[Embed]meta data). -
Load them from disk (only possible for AIR applications).
-
Load them from an URL, e.g. from a webserver.
Since every option requires different code (depending on the asset type and loading mechanism), it’s difficult to access the assets in a uniform way. Thankfully, Starling contains a class that helps you with that: the AssetManager.
It supports the following types of assets:
-
Textures (either from Bitmaps or ATF data)
-
Texture atlases
-
Bitmap Fonts
-
Sounds
-
XML data
-
JSON data
-
ByteArrays
To accomplish this, the AssetManager uses a three-step approach:
-
You add pointers to your assets to a queue, e.g.
Fileobjects or URLs. -
You tell the AssetManager to process the queue.
-
As soon as the queue finishes processing, you can access all assets with corresponding
getmethods.
|
The AssetManager contains a |
3.7.1. AssetManager versions
Starling 2.4 features a new, much enhanced AssetManager. All the code examples that follow were written with this new version in mind.
The new AssetManager class can be found in the starling.assets package.
For compatibility reasons, the old version is still available at its previous location (in starling.utils), but it’s now marked as deprecated.
Upgrading to the new version should be really painless — the changes in the public API were kept at a minimum.
In exchange, you can profit from the new version’s much higher flexibility.
3.7.2. Enqueuing the Assets
The first step is to enqueue all the assets you want to use. How that’s done exactly depends on the type and origin of each asset.
Assets from disk or from the network
Enqueuing files from disk or from a remote server is rather straight-forward:
// Enqueue an asset from a remote URL
assets.enqueue("http://gamua.com/img/starling.jpg");

// Enqueue an asset from disk (AIR only)
var appDir:File = File.applicationDirectory;
assets.enqueue(appDir.resolvePath("sounds/music.mp3"));

// Enqueue all contents of a directory, recursively (AIR only).
assets.enqueue(appDir.resolvePath("textures"));
To load a texture atlas, just enqueue both its XML file and the corresponding texture.
Make sure that the imagePath attribute in the XML file contains the correct filename, because that’s what the AssetManager will look for when it creates the atlas later.
assets.enqueue(appDir.resolvePath("textures/atlas.xml"));
assets.enqueue(appDir.resolvePath("textures/atlas.png"));
Bitmap Fonts work just the same.
In this case, you need to make sure that the file attribute in the XML (the .fnt file) is set up correctly.
assets.enqueue(appDir.resolvePath("fonts/desyrel.fnt"));
assets.enqueue(appDir.resolvePath("fonts/desyrel.png"));
Assets that are embedded
For embedded assets, I recommend you put all the embed statements into one dedicated class.
Declare them as public static const and follow these naming conventions:
-
Classes for embedded images should have the exact same name as the file, without extension. This is required so that references from XMLs (atlas, bitmap font) won’t break.
-
Atlas and font XML files can have an arbitrary name, since they are never referenced by file name.
Here’s a sample of such a class:
public class EmbeddedAssets
{
    /* PNG texture */
    [Embed(source = "/textures/bird.png")]
    public static const bird:Class;

    /* ATF texture */
    [Embed(source   = "textures/1x/atlas.atf",
           mimeType = "application/octet-stream")]
    public static const atlas:Class;

    /* XML file */
    [Embed(source   = "textures/1x/atlas.xml",
           mimeType = "application/octet-stream")]
    public static const atlas_xml:Class;

    /* MP3 sound */
    [Embed(source = "/audio/explosion.mp3")]
    public static const explosion:Class;
}
When you enqueue that class, the asset manager will later instantiate all the assets that are embedded within.
var assets:AssetManager = new AssetManager();
assets.enqueue(EmbeddedAssets); (1)| 1 | Enqueues bird texture, explosion sound, and a texture atlas. |
Per-Asset Configuration
When you create a texture manually (via the Texture.from…() factory methods), you’ve got a chance to fine-tune how it is created.
For example, you can decide on a texture format or scale factor.
The problem with those settings: once the texture is created, you cannot change them any more. So you need to make sure the correct settings are applied right when the texture is created. The asset manager supports this kind of configuration, too:
var assets:AssetManager = new AssetManager();
assets.textureOptions.format = Context3DTextureFormat.BGRA_PACKED;
assets.textureOptions.scale = 2;
assets.enqueue(EmbeddedAssets);
The asset manager will adhere to these settings for all the textures it creates.
However, it seems that this would only allow one set of properties for all the loaded textures, right?
Actually, no: you just need to enqueue them in several steps, assigning the right settings prior to each call to enqueue.
assets.textureOptions.scale = 1;
assets.enqueue(appDir.resolvePath("textures/1x"));

assets.textureOptions.scale = 2;
assets.enqueue(appDir.resolvePath("textures/2x"));
This will make the textures from the 1x and 2x folders use scale factors of one and two, respectively.
3.7.3. Loading the Assets
Now that the assets are enqueued, you can load all of them at once. Depending on the number and size of assets you are loading, this can take a while.
The loadQueue method accepts up to three different parameters, with separate callbacks for completion, error handling and progress.
Only the first parameter (onComplete) is obligatory.
assets.loadQueue(onComplete, onError, onProgress);

function onComplete():void { trace("done!"); } (1)
function onError(error:String):void { trace("error:", error); } (2)
function onProgress(ratio:Number):void { trace("progress:", ratio); } (3)| 1 | You can always rely on onComplete to be called once at the very end. |
| 2 | onError may be executed multiple times (once for every asset that can’t be loaded). |
| 3 | Use onProgress if you want to show some kind of progress bar or loading indicator. |
|
That’s the one part where you need to be careful when migrating to the new AssetManager.
Previously, there was just a single callback parameter in the |
With an enabled verbose property, you’ll see the names with which the assets can be accessed.
[AssetManager] Adding sound 'explosion'
[AssetManager] Adding texture 'bird'
[AssetManager] Adding texture 'atlas'
[AssetManager] Adding texture atlas 'atlas'
3.7.4. Accessing the Assets
Finally: now that the queue finished processing, you can access your assets with the various get… methods of the AssetManager.
Each asset is referenced by a name, which is the file name of the asset (without extension) or the class name of embedded objects.
var texture:Texture = assets.getTexture("bird"); (1)
var textures:Vector.<Texture> = assets.getTextures("animation"); (2)
var explosion:SoundChannel = assets.playSound("explosion"); (3)| 1 | This will first search named textures, then atlases. |
| 2 | Same as above, but returns all (sub) textures starting with the given String. |
| 3 | Plays a sound and returns the SoundChannel that controls it. |
If you enqueued a bitmap font along the way, it will already be registered and ready to use.
|
In my games, I typically store a reference to the asset manager at my root class, accessible through a |
|
The Starling Wiki contains two extensions for the AssetManager that are worth checking out:
|
3.8. Fragment Filters
Up to this point, all the drawable objects we discussed were meshes with (or without) textures mapped onto them. You can move meshes around, scale them, rotate them, and maybe tint them in a different color. All in all, however, the possibilities are rather limited — the look of the game is solely defined by its textures.
At some point, you will run into the limits of this approach; perhaps you need a variant of an image in multiple colors, blurred, or with a drop shadow. If you add all of those variants into your texture atlas, you will soon run out of memory.
Fragment filters can help with that. A filter can be attached to any display object (including containers) and can completely change its appearance.
For example, let’s say you want to add a Gaussian blur to an object:
var filter:BlurFilter = new BlurFilter(); (1)
object.filter = filter; (2)| 1 | Create and configure an instance of the desired filter class. |
| 2 | Assign the filter to the filter property of a display object. |
With a filter assigned, rendering of a display object is modified like this:
-
Each frame, the target object is rendered into a texture.
-
That texture is processed by a fragment shader (directly on the GPU).
-
Some filters use multiple passes, i.e. the output of one shader is fed into the next.
-
Finally, the output of the last shader is drawn to the back buffer.
This approach is extremely flexible, allowing to produce all kinds of different effects (as we will see shortly). Furthermore, it makes great use of the GPU’s parallel processing abilities; all the expensive per-pixel logic is executed right on the graphics chip.
That said: filters break batching, and each filter step requires a separate draw call. They are not exactly cheap, both regarding memory usage and performance. So be careful and use them wisely.
3.8.1. Showcase
Out of the box, Starling comes with a few very useful filters.
BlurFilter
Applies a Gaussian blur to an object. The strength of the blur can be set for x- and y-axis separately.
-
Per blur direction, the filter requires at least one render pass (draw call).
-
Per strength unit, the filter requires one render pass (a strength of
1requires one pass, a strength of2two passes, etc). -
Instead of raising the blur strength, it’s often better to lower the filter resolution. That has a similar effect, but is much cheaper.
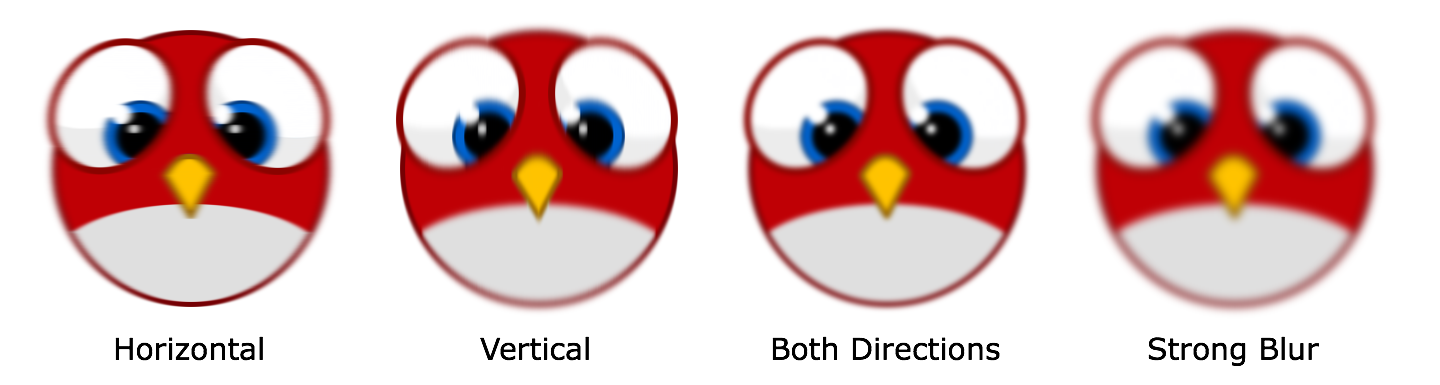
ColorMatrixFilter
Dynamically alters the color of an object. Change an object’s brightness, saturation, hue, or invert it altogether.
This filter multiplies the color and alpha values of each pixel with a 4 × 5 matrix. That’s a very flexible concept, but it’s also quite cumbersome to get to the right matrix setup. For this reason, the class contains several helper methods that will set up the matrix for the effects you want to achieve (e.g. changing hue or saturation).
-
You can combine multiple color transformations in just one filter instance. For example, to change both brightness and saturation, call both of the corresponding methods on the filter.
-
This filter always requires exactly one pass.
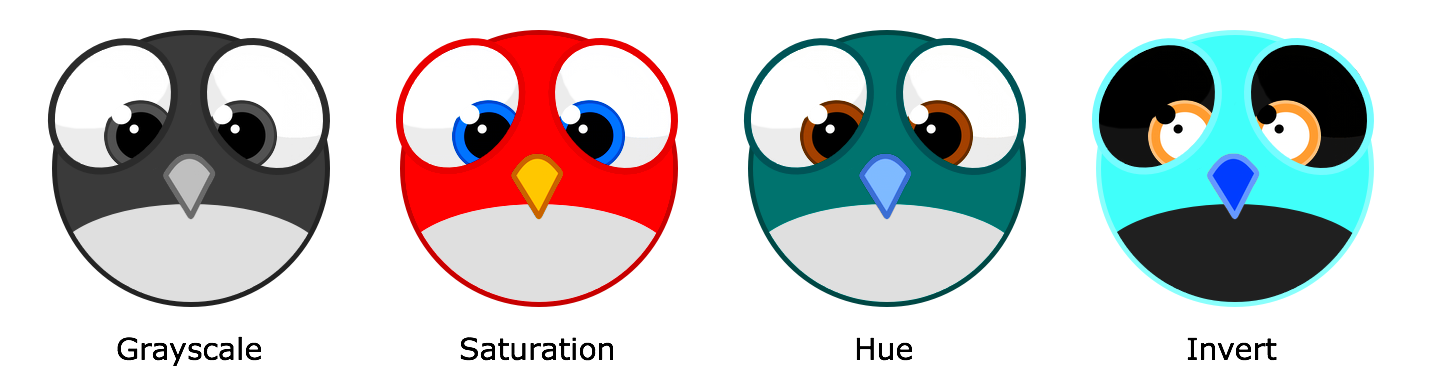
DropShadow- and GlowFilter
These two filters draw a shadow or glow (i.e. the result of a tinted BlurFilter) behind or inside the original object.
-
That also makes them rather expensive, because they add an additional render pass to what’s required by a pure BlurFilter.
-
Draw just the shadow or glow by setting
knockouttotrue.
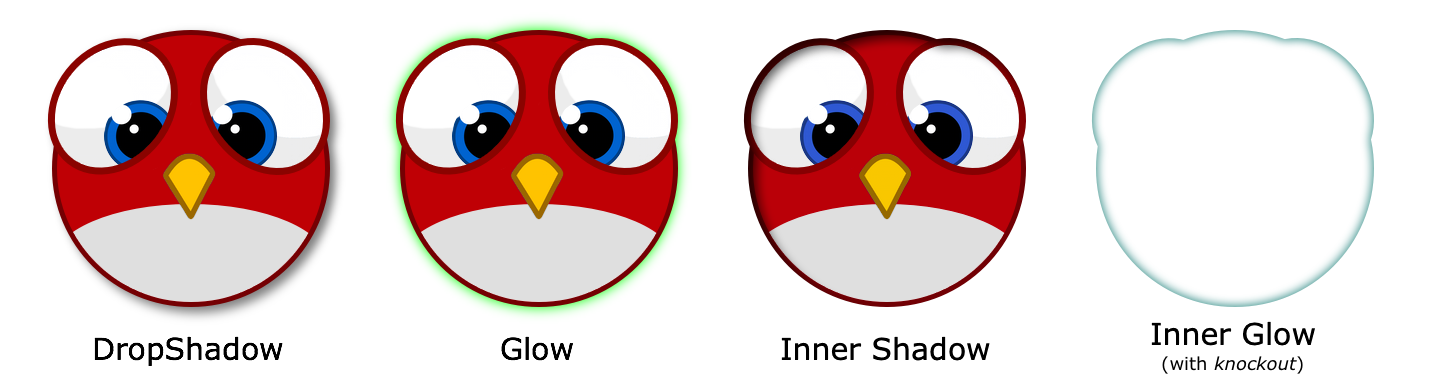
DisplacementMapFilter
Displaces the pixels of the target object depending on the colors in a map texture.
-
Not exactly easy to use, but very powerful!
-
Reflection on water, a magnifying glass, the shock wave of an explosion — this filter can do it.

3.8.2. Performance Tips
I mentioned it above: while the GPU processing part is very efficient, the additional draw calls make fragment filters rather expensive. However, Starling does its best to optimize filters.
-
When an object does not change its position relative to the stage (or other properties like scale and color) for two successive frames, Starling recognizes this and will automatically cache the filter output. This means that the filter won’t need to be processed any more; instead, it behaves just like a single image.
-
On the other hand, when the object is constantly moving, the last filter pass is always rendered directly to the back buffer instead of a texture. That spares one draw call.
-
If you want to keep using the filter output even though the object is moving, call
filter.cache(). Again, this will make the object act just like a static image. However, for any changes of the target object to show up, you must callcacheagain (oruncache). -
To save memory, experiment with the
resolutionandtextureFormatproperties. This will reduce image quality, though.
3.8.3. More Filters
Would you like to know how to create your own filters? Don’t worry, we will investigate that topic a little later (see Custom Filters).
In the meantime, you can try out filters created by other Starling developers. An excellent example is the filter collection by Devon O. Wolfgang.
3.9. Meshes
Mesh is the basic building block of all tangible display objects. By "tangible", I mean a "leaf" object in the display list: an object that is not a container but is rendered directly to the back buffer. Since it is so important, I want to look at this class in a little more detail.
In a nutshell, a Mesh represents a list of triangles to be rendered via Stage3D. It was mentioned a few times already, since it’s the base class of Quad and Image. As a reminder, here is the class hierarchy we are talking about:

Mesh is not an abstract class; nothing prevents you from instantiating it directly. Here’s how:
var vertexData:VertexData = new VertexData();
vertexData.setPoint(0, "position", 0, 0);
vertexData.setPoint(1, "position", 10, 0);
vertexData.setPoint(2, "position", 0, 10);

var indexData:IndexData = new IndexData();
indexData.addTriangle(0, 1, 2);

var mesh:Mesh = new Mesh(vertexData, indexData);
addChild(mesh);
As you can see, we first needed to instantiate two more classes: VertexData and IndexData. They represent collections of vertices and indices, respectively.
-
VertexData efficiently stores the attributes of each vertex, e.g. its position and color.
-
IndexData stores indices to those vertices. Every three indices will make up a triangle.
That way, the code above created the most basic drawing primitive: a triangle. We did this by defining three vertices and referencing them clockwise. After all, that’s what a GPU can do best: drawing triangles — lots of them.
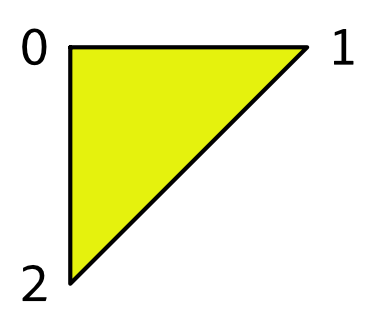
3.9.1. Extending Mesh
Working directly with VertexData and IndexData would be quite bothersome over time. It makes sense to encapsulate the code in a class that takes care of setting everything up.
To illustrate how to create custom meshes, we will now write a simple class called NGon. Its task: to render a regular n-sided polygon with a custom color.
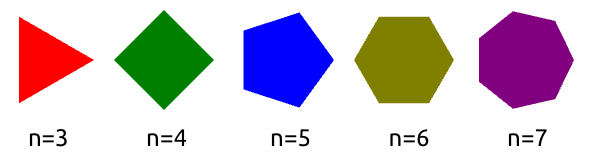
We want the class to act just like a built-in display object. You instantiate it, move it to a certain position and then add it to the display list.
var ngon:NGon = new NGon(100, 5, Color.RED); (1)
ngon.x = 60;
ngon.y = 60;
addChild(ngon);| 1 | The constructor arguments define radius, number of edges, and color. |
Let’s look at how we can achieve this feat.
3.9.2. Vertex Setup
Like all other shapes, our regular polygon can be built from just a few triangles.
Here’s how we could set up the triangles of a pentagon (an n-gon with n=5).
The pentagon is made up of six vertices spanning up five triangles. We give each vertex a number between 0 and 5, with 5 being in the center.
As mentioned, the vertices are stored in a VertexData instance. VertexData defines a set of named attributes for each vertex. In this sample, we need two standard attributes:
-
positionstores a two-dimensional point (x, y). -
colorstores an RGBA color value.
The VertexData class defines a couple of methods referencing those attributes. That allows us to set up the vertices of our polygon.
Create a new class called NGon that extends Mesh. Then add the following instance method:
private function createVertexData(
    radius:Number, numEdges:int, color:uint):VertexData
{
    var vertexData:VertexData = new VertexData();

    vertexData.setPoint(numEdges, "position", 0.0, 0.0); (1)
    vertexData.setColor(numEdges, "color", color);

    for (var i:int=0; i<numEdges; ++i) (2)
    {
        var edge:Point = Point.polar(radius, i*2*Math.PI / numEdges);
        vertexData.setPoint(i, "position", edge.x, edge.y);
        vertexData.setColor(i, "color", color);
    }

    return vertexData;
}| 1 | Set up center vertex (last index). |
| 2 | Set up edge vertices. |
Since our mesh has a uniform color, we assign the same color to each vertex. The positions of the edge vertices (the corners) are distributed along a circle with the given radius.
3.9.3. Index Setup
That’s it for the vertices. Now we need to define the triangles that make up the polygon.
Stage3D wants a simple list of indices, with each three successive indices referencing one triangle. It’s a good practice to reference the indices clockwise; that convention indicates that we are looking at the front side of the triangle. Our pentagon’s list would look like this:
5, 0, 1, 5, 1, 2, 5, 2, 3, 5, 3, 4, 5, 4, 0
In Starling, the IndexData class is used to set up such a list. The following method will fill an IndexData instance with the appropriate indices.
private function createIndexData(numEdges:int):IndexData
{
    var indexData:IndexData = new IndexData();

    for (var i:int=0; i<numEdges; ++i)
        indexData.addTriangle(numEdges, i, (i+1) % numEdges);

    return indexData;
}
3.9.4. NGon constructor
This is actually all we need for our NGon class! Now we just need to make use of the above methods in the constructor. All the other responsibilities of a display object (hit testing, rendering, bounds calculations, etc.) are handled by the superclass.
public class NGon extends Mesh
{
    public function NGon(
        radius:Number, numEdges:int, color:uint=0xffffff)
    {
        var vertexData:VertexData = createVertexData(radius, numEdges, color);
        var indexData:IndexData = createIndexData(numEdges);

        super(vertexData, indexData);
    }

    // ...
}
That’s rather straight-forward, isn’t it? This approach works for any shape you can think of.
|
When working with custom meshes, also look at the Polygon class (in the |
3.9.5. Adding a Texture
Wouldn’t it be nice if we were able to map a texture onto this polygon, as well?
The base class, Mesh, already defines a texture property; we’re only lacking the required texture coordinates.
Through texture coordinates, you define which part of a texture gets mapped to a vertex. They are often called UV-coordinates, which is a reference to the names that are typically used for their coordinate axes (u and v). Note that the UV range is defined to be within 0 and 1, regardless of the actual texture dimensions.

With this information, we can update the createVertexData method accordingly.
function createVertexData(
    radius:Number, numEdges:int, color:uint):VertexData
{
    var vertexData:VertexData = new VertexData(null, numEdges + 1);
    vertexData.setPoint(numEdges, "position", 0.0, 0.0);
    vertexData.setColor(numEdges, "color", color);
    vertexData.setPoint(numEdges, "texCoords", 0.5, 0.5); (1)

    for (var i:int=0; i<numEdges; ++i)
    {
        var edge:Point = Point.polar(radius, i*2*Math.PI / numEdges);
        vertexData.setPoint(i, "position", edge.x, edge.y);
        vertexData.setColor(i, "color", color);

        var u:Number = (edge.x + radius) / (2 * radius); (2)
        var v:Number = (edge.y + radius) / (2 * radius);
        vertexData.setPoint(i, "texCoords", u, v);
    }

    return vertexData;
}| 1 | The texture coordinates of the center vertex: 0.5, 0.5. |
| 2 | The origin of the n-gon is in the center, but the texture coordinates must be all positive.
So we move the vertex coordinates to the right (by radius) and divide them by 2 * radius to end up in the range 0-1. |
When a texture is assigned, the rendering code will automatically pick up those values.
var ngon:NGon = new NGon(100, 5);
ngon.texture = assets.getTexture("brick-wall");
addChild(ngon);
3.9.6. Anti-Aliasing
If you look closely at the edges of our n-gon, you will see that the edges are quite jagged. That’s because the GPU treats a pixel either within the n-gon, or outside — there are no in-betweens. To fix that, you can enable anti-aliasing: there’s a property with that name on the Starling class.
starling.antiAliasing = 2;The value correlates to the number of subsamples Stage3D uses on rendering. Using more subsamples requires more calculations to be performed, making anti-aliasing a potentially very expensive option. Furthermore, Stage3D doesn’t support anti-aliasing on all platforms.
| Full-screen anti-aliasing is available on all desktop platforms, except when using software rendering. Support for iOS was added in AIR 24; Android is currently only supported via RenderTextures. |
Thus, it’s not an ideal solution. Luckily, however, the typical pixel-density of mobile devices is constantly on the rise. On modern, high end mobile phones, the pixels are now so small that aliasing is much less an issue than it was in the past.
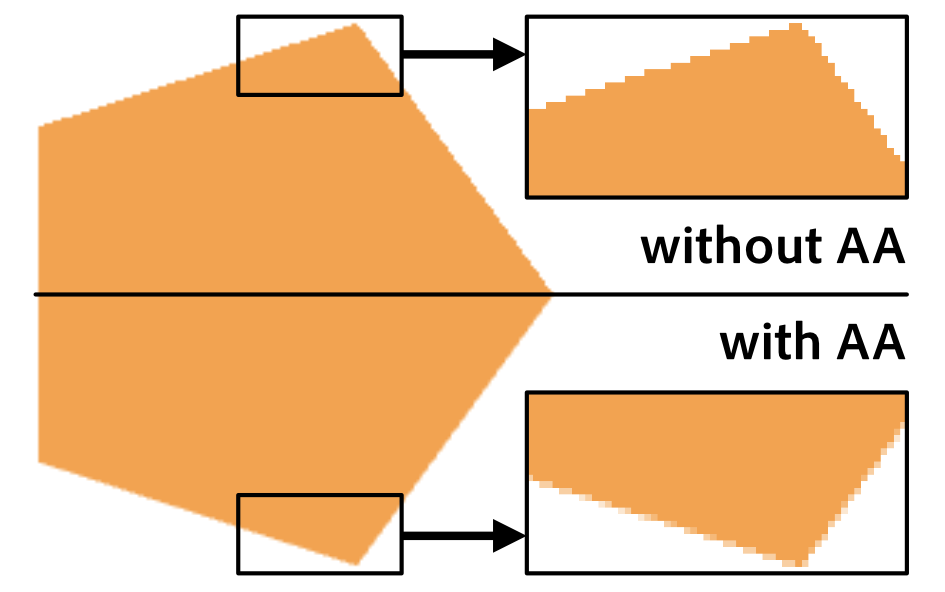
3.9.7. Mesh Styles
You now know how to create textured meshes with arbitrary shapes. For this, you are using the standard rendering mechanics built into Starling.
However, what if you want to customize the rendering process itself? The properties and methods of the Mesh class provide a solid foundation — but sooner or later, you will want more than that.
Coming to the rescue: Starling’s mesh styles.
Styles are a brand new addition to Starling (introduced in version 2.0) and are the recommended way to create custom, high performance rendering code. In fact, all rendering in Starling is now done via mesh styles.
-
A style can be assigned to any mesh (instances of the Mesh class or its subclasses).
-
Per default, the style of each mesh is an instance of the base MeshStyle class.
-
The latter provides the standard rendering capabilities of Starling: drawing colored and textured triangles.
To teach your meshes new tricks, you can extend MeshStyle. This allows you to create custom shader programs for all kinds of interesting effects. For example, you could implement fast color transformations or multi-texturing.
|
One of the most impressive samples of a style is the Dynamic Lighting extension. With the help of a normal map (a texture encoding surface normals), it can provide realistic real-time lighting effects. Be sure to check out this extension in the Starling Wiki to see it in action! |
To use a style, instantiate it and assign it to the style property of the mesh:
var image:Image = new Image(texture);
var lightStyle:LightStyle = new LightStyle(normalTexture);
image.style = lightStyle;
Styles are extremely versatile; their possible applications are almost without limit. And since meshes with the same style can be batched together, you do not sacrifice performance in any way. In this respect, they are much more efficient than fragment filters (which serve a similar purpose).
The main downsides of styles are simply that they can only be assigned to a mesh (not, say, a sprite), and that they can only act within the actual mesh area (making things like a blur impossible). Furthermore, it’s not possible to combine several styles on one mesh.
Still: styles are a powerful tool that any Starling developer should be familiar with. Stay tuned: in the section Custom Styles, I will show you how to create your own mesh style from scratch, shaders and all!
|
If you’re still a little confused about the differences between a Mesh and a MeshStyle, think of it like this: the Mesh is nothing more than a list of vertices, and how those vertices spawn up triangles. A style may add additional data to each vertex and use it on rendering. The standard MeshStyle provides color and texture coordinates; a MultiTextureStyle might add an additional set of texture coordinates, etc. But a style should never modify the original shape of the object; it won’t add or remove vertices or change their positions. |
3.10. Masks
Masks can be used to cut away parts of a display object. Think of a mask as a "hole" through which you can look at the contents of another display object. That hole can have an arbitrary shape.
If you’ve used the "mask" property of the classic display list, you’ll feel right at home with this feature. Just assign a display object to the new mask property, as shown below. Any display object can act as a mask, and it may or may not be part of the display list.
var sprite:Sprite = createSprite();
var mask:Quad = new Quad(100, 100);
mask.x = mask.y = 50;
sprite.mask = mask; // ← use the quad as a mask
This will yield the following result:
The logic behind masks is simple: a pixel of a masked object will only be drawn if it is within the mask’s polygons. This is crucial: the shape of the mask is defined by its polygons — not its texture! Thus, such a mask is purely binary: a pixel is either visible, or it is not.
|
Masks and AIR
For masks to work in an AIR application, you will need to activate the stencil buffer in the application descriptor.
Add the following setting to the But don’t worry, Starling will print a warning to the console if you forget to do so. |
3.10.1. Canvas and Polygon
"This mask feature looks really nice", you might say, "but how the heck am I going to create those arbitrary shapes you were talking about?!" Well, I’m glad you ask!
Indeed: since masks rely purely on geometry, not on any textures, you need a way to draw your mask-shapes. In a funny coincidence, there are actually two classes that can help you with exactly this task: Canvas and Polygon. They go hand-in-hand with stencil masks.
The API of the Canvas class is similar to Flash’s Graphics object. This will e.g. draw a red circle:
var canvas:Canvas = new Canvas();
canvas.beginFill(0xff0000);
canvas.drawCircle(0, 0, 120);
canvas.endFill();
There are also methods to draw an ellipse, a rectangle or an arbitrary polygon.
| Other than those basic methods, the Canvas class is rather limited; don’t expect a full-blown alternative to the Graphics class just yet. This might change in a future release, though! |
That brings us to the Polygon class.
A Polygon (package starling.geom) describes a closed shape defined by a number of straight line segments.
It’s a spiritual successor of Flash’s Rectangle class, but supporting (mostly) arbitrary shapes.
Since Canvas contains direct support for polygon objects, it’s the ideal companion of Polygon. This pair of classes will solve all your mask-related needs.
var polygon:Polygon = new Polygon(); (1)
polygon.addVertices(0,0,  100,0,  0,100);

var canvas:Canvas = new Canvas();
canvas.beginFill(0xff0000);
canvas.drawPolygon(polygon); (2)
canvas.endFill();| 1 | This polygon describes a triangle. |
| 2 | Draw the triangle to a canvas. |
There are a few more things about masks I want to note:
- Visibility
-
The mask itself is never visible. You always only see it indirectly via its effect on the masked display object.
- Positioning
-
If the mask is not part of the display list (i.e. it has no parent), it will be drawn in the local coordinate system of the masked object: if you move the object, the mask will follow. If the mask is part of the display list, its location will be calculated just as usual. Depending on the situation, you might prefer one or the other behavior.
- Stencil Buffer
-
Behind the scenes, masks use the stencil buffer of the GPU, making them very lightweight and fast. One mask requires two draw calls: one to draw the mask into the stencil buffer and one to remove it when all the masked content has been rendered.
- Scissor Rectangle
-
If the mask is an untextured Quad parallel to the stage axes, Starling can optimize its rendering. Instead of the stencil buffer, it will then use the scissor rectangle — sparing you one draw call.
- Texture Masks
-
If a simple vector shape just doesn’t cut it, there is an extension that allows you to use the alpha channel of a texture as a stencil mask. It’s called Texture Mask and is found in the Starling Wiki.
3.11. Sprite3D
All display objects that we looked at in the previous sections represent pure two-dimensional objects. That’s to be expected — Starling is a 2D engine, after all. However, even in a 2D game, it’s sometimes nice to add a simple 3D effect, e.g. for transitioning between two screens or to show the backside of a playing card.
For this reason, Starling contains a class that makes it easy to add basic 3D capabilities: Sprite3D. It allows you to move your 2D objects around in a three dimensional space.
3.11.1. Basics
Just like a conventional Sprite, you can add and remove children to this container, which allows you to group several display objects together. In addition to that, however, Sprite3D offers several interesting properties:
-
z — Moves the sprite along the z-axis (which points away from the camera).
-
rotationX — Rotates the sprite around the x-axis.
-
rotationY — Rotates the sprite around the y-axis.
-
scaleZ — Scales the sprite along the z-axis.
-
pivotZ — Moves the pivot point along the z-axis.
With the help of these properties, you can place the sprite and all its children in the 3D world.
var sprite:Sprite3D = new Sprite3D(); (1)

sprite.addChild(image1); (2)
sprite.addChild(image2);

sprite.x = 50; (3)
sprite.y = 20;
sprite.z = 100;
sprite.rotationX = Math.PI / 4.0;

addChild(sprite); (4)| 1 | Create an instance of Sprite3D. |
| 2 | Add a few conventional 2D objects to the sprite. |
| 3 | Set up position and orientation of the object in 3D space. |
| 4 | As usual, add it to the display list. |
As you can see, it’s not difficult to use a Sprite3D: you simply have a few new properties to explore. Hit-testing, animations, custom rendering — everything works just like you’re used to from other display objects.
3.11.2. Camera Setup
Of course, if you’re displaying 3D objects, you also want to be able to configure the perspective with which you’re looking at those objects. That’s possible by setting up the camera; and in Starling, the camera settings are found on the stage.
The following stage properties set up the camera:
-
fieldOfView — Specifies an angle (radian, between zero and PI) for the field of view (FOV).
-
focalLength — The distance between the stage and the camera.
-
projectionOffset — A vector that moves the camera away from its default position, which is right in front of the center of the stage.
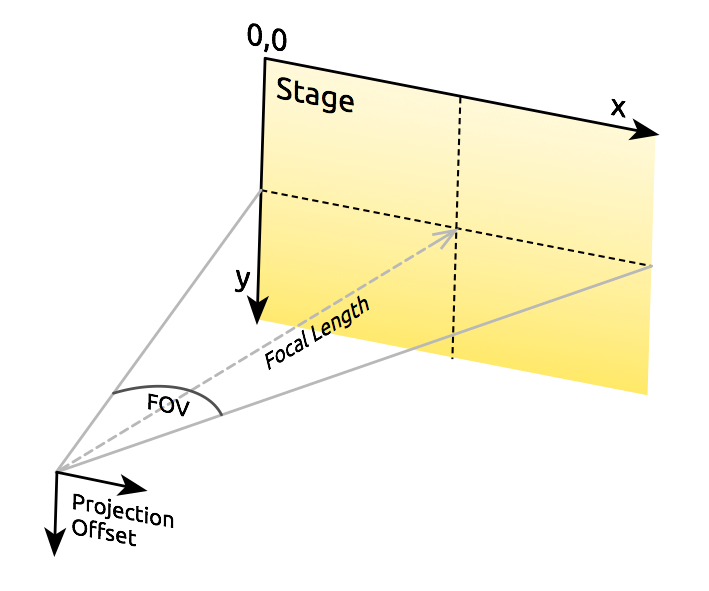
Starling will always make sure that the stage will fill the entire viewport. If you change the field of view, the focal length will be modified to adhere to this constraint, and the other way round. In other words: fieldOfView and focalLength are just different representations of the same property.
Here’s an example of how different fieldOfView values influence the look of the cube from the Starling demo:
Per default, the camera will always be aligned so that it points towards the center of the stage. The projectionOffset allows you to change the perspective away from this point; use it if you want to look at your objects from another direction, e.g. from the top or bottom.
Here’s the cube again, this time using different settings for projectionOffset.y:
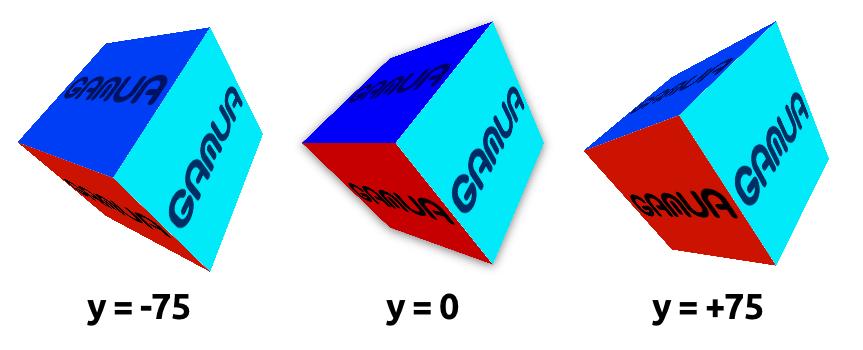
3.11.3. Limitations
Starling is still a 2D engine at its heart, and this means that there are a few limitations you should be aware of:
-
Starling does not make any depth tests. Visibility is determined solely by the order of children.
-
You need to be careful about the performance. Each Sprite3D instance interrupts batching.
However, there’s a trick that mitigates the latter problem in many cases: when the object is not actually 3D transformed, i.e. you’re doing nothing that a 2D sprite couldn’t do just as well, then Starling treats it just like a 2D object — with the same performance and batching behavior.
This means that you don’t have to avoid having a huge number of Sprite3D instances; you just have to avoid that too many of them are 3D-transformed at the same time.
3.12. Utilities
The starling.utils package contains several useful little helpers that shouldn’t be overlooked.
3.12.1. Colors
In both conventional Flash and Starling, colors are specified in hexadecimal format. Here are a few examples:
// format:         0xRRGGBB
var red:Number   = 0xff0000;
var green:Number = 0x00ff00; // or 0xff00
var blue:Number  = 0x0000ff; // or 0xff
var white:Number = 0xffffff;
var black:Number = 0x000000; // or simply 0
The Color class contains a list of named color values; furthermore, you can use it to easily access the components of a color.
var purple:uint = Color.PURPLE; (1)
var lime:uint   = Color.LIME;
var yellow:uint = Color.YELLOW;

var color:uint = Color.rgb(64, 128, 192); (2)

var red:int   = Color.getRed(color);   // ->  64 (3)
var green:int = Color.getGreen(color); // -> 128
var blue:int = Color.getBlue(color); // -> 192| 1 | A few common colors are predefined. |
| 2 | Any other color can be created with this method. Just pass the RGB values to this method (range: 0 - 255). |
| 3 | You can also extract the integer value of each channel. |
3.12.2. Angles
Starling expects all angles in radians (different to Flash, which uses degrees in some places and radians in others). To convert between degrees and radians, you can use the following simple functions.
var degrees:Number = rad2deg(Math.PI); // -> 180
var radians:Number = deg2rad(180);     // -> PI
3.12.3. StringUtil
You can use the format method to format Strings in .Net/C# style.
StringUtil.format("{0} plus {1} equals {2}", 4, 3, "seven");
  // -> "4 plus 3 equals seven"
The same class also contains methods that trim whitespace from the start and end of a string — a frequent operation whenever you need to process user input.
StringUtil.trim(" hello world\n"); // -> "hello world"3.12.4. SystemUtil
It’s often useful to find out information about the environment an app or game is currently executed in. The SystemUtil contains some methods and properties helping with that task.
SystemUtil.isAIR; // AIR or Flash?
SystemUtil.isDesktop; // desktop or mobile?
SystemUtil.isApplicationActive; // in use or minimized?
SystemUtil.platform; // WIN, MAC, LNX, IOS, AND
3.12.5. MathUtil
While that class is mainly designed to help with some geometric problems, it also contains the following very useful helper methods:
var min:Number = MathUtil.min(1, 10); (1)
var max:Number = MathUtil.max(1, 10); (2)
var inside:Number = MathUtil.clamp(-5, 1, 10); (3)| 1 | Get the smallest of two numbers. Result: 1 |
| 2 | Get the biggest of two numbers. Result: 10 |
| 3 | Move the number (first argument) into a specific range. Result: 1 |
If you have worked with AS3 in the past, you might wonder why I made the effort of writing those methods when similar ones are already provided in the native Math class.
Unfortunately, those equivalent methods have a side effect: each time you call e.g. Math.min, it creates a temporary object (at least when you compile your app for iOS, that is).
Those alternatives do not have this side effect, so you should always prefer them.
3.12.6. Pooling
Now that we touched the topic of temporary objects, it’s the perfect time to introduce you to the Pool class.
Experienced AS3 developers know that any object allocation comes at a price: the object needs to be garbage collected later. This happens completely behind the scenes; you won’t even notice it most of the time.
However, when the cleanup process takes up too much time, your app will freeze for a short moment. If that happens often, it quickly becomes a nuisance to your users.
One tactic to avoid this problem is to recycle your objects and use them repeatedly. For example, classes like Point and Rectangle are often just needed for a short moment: you create them, fill them with some data, and then throw them away.
From now on, let Starling’s Pool class handle those objects.
var point:Point = Pool.getPoint(); (1)
doSomethingWithPoint(point);
Pool.putPoint(point); (2)

var rect:Rectangle = Pool.getRectangle(); (1)
doSomethingWithRectangle(rect);
Pool.putRectangle(rect); (2)| 1 | Get an object from the pool. That replaces calling new on the class. |
| 2 | Put it back into the pool when you do not need it any longer. |
The class also supports Vector3D, Matrix, and Matrix3D, in a similar style.
| Always make sure that the get and put-calls are balanced. If you put too many objects into the pool and never retrieve them, it will fill up over time, using more and more memory. |
3.12.7. Furthermore …
The starling.utils package contains more helpers than I can possibly list here.
For a complete list of methods and classes, refer to the API Reference.
It will definitely pay off to take a look!
3.13. Summary
You are now familiar with all the basic concepts of the Starling Framework. This is all the knowledge you need to get started with that game you have in your head, or with that app that’s waiting to be created.
On the other hand, there are still a few tricks up the sleeves of our little bird (birds have sleeves?). If you’re ready to jump into those advanced topics, please follow my lead.